In this tutorial, we are going to make a man of steel.
I hope you like the effect.
One way to open our image, is by click and drag our image
from our image folder into Gimp, like so.
There is a download link for the image and the PDF text file in the video description.
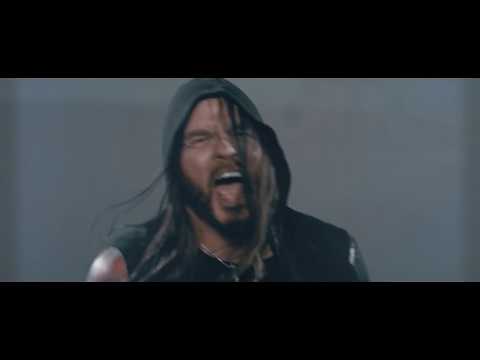
This technique works best when our source image has good contrast,
especially in the face.
Go to view, zoom and fit image in window.
Then we right click on the layer and click on add alpha channel.
In this way the layer can have transparency.
We make a duplicate of this layer,
by clicking the duplicate button at the bottom of thelayers panel.
Double click on its name and rename it face.
Hit enter.
Now we go to the toolbox and we make the paths tool active.
If you are not familiar with this tool, you can find a link in the top of your screen
to a short and simple tutorial about the paths tool.
In a few minutes, you will know how to work with this tool.
In the tool options we click on the configure tab icon.
Then on tool options menu and on reset all tool options.
In the dialog box we can just click reset.
In this way the tool options of all tools are back at their default settings.
Now we are going to select the face.
We can zoom in and out by holding the Ctrl key and rolling the mouse wheel.
We are going to make a path around the face.
Usually it is best to stay just a little bit inside the boundaries of our subject.
But in this case however, it is better to make the path a bit
on the outside of the boundaries.
When we press and hold the mouse wheel, we can, by moving the mouse, move the image.
With Ctrl+Z we can undo and with Ctrl+Y we can redo.
We will speed up the video now.
To close the path, we hover the last node over the first one.
Then we hold the Ctrl key and we can click to close the path.
Now go to the tool options and hit the button selection from path.
Make the whole image visible by pressing Ctrl+Shift+J.
Click on a random tool in the tool box to make the path invisible.
Go to colors, desaturate and again desaturate.
Just click okay in the dialog box.
Go back to colors and now to brightness and contrast.
We increase the brightness to about 20 and the contrast to about 40.
When using an image of your own, you might want to adjust these values to get a similar contrast.
Then click okay.
Go to filters, blur and selective gaussian blur.
Make the radius 30.
Now this may take a moment, depending on your system, to become visible.
You can see that the selection lines disappear while Gimp is applying the effect.
Selective Gaussian blur is only applied if the difference between its value and the value
of the surrounding pixels is less than the defined Delta value.
So, contrasts are preserved because difference is high on contrast limits.
When the marching ants are visible again, the layer is blurred, and we can hit okay.
We are going to copy this selection.
Go to edit and hit copy.
Again to edit and now to paste as, and here we click on new layer.
Make a duplicate by clicking the duplicate button.
Go to colors in the menu bar.
Here we click on invert, to invert the black and white.
Change the mode of this layer to difference.
Then we right click on the top layer and click merge down.
Double click on the pasted layers name and rename it steel.
Hit enter.
Once more we go to colors and we click on invert again.
Back to colors and now we hit posterize.
This tool is designed to intelligently weigh the pixel colors of the selection or active layer
and reduce the number of colors while maintaining a semblance
of the original image characteristics.
This works also in black and white images, layers or selections.
We can choose any posterize level we like.
In this case I have chosen 4.
Now we can click okay.
Back to filters, blur, and this time we choose the regular gaussian blur.
Make the blur size 2,5 and again, when using an other image,
you might want to change this value, according to the size of your image.
The goal is to soften the hard edges just a little bit.
Click okay.
Go to select and click on none to deselect the selection.
In the next step we are going to work on the eyes and the teeth.
Make a new layer, by clicking the new layer icon.
Name it eyes.
The mode should be normal and the fill with transparency.
Click okay.
Then we make, in the toolbox, the paintbrush active.
Swap the foreground/background colors, so white is our foreground color.
Make sure you have brush hardness 050.
Zoom in to the teeth and make them white, like so.
Use the bracket keys to change the brush size.
And here too we can use Ctrl+Z to undo.
Then move to the eyes and paint the eye-white as shown in the video.
Now we make in each eye a glimmer light.
Press Ctrl+Shift+J. We are going to give the black and white a bit of a steel blueish color.
Click on the new layer button.
Name it blueish and click okay.
Right click on the middle layer and click on alpha to selection.
In this way everything that is not transparent, is selected.
Make the blueish layer active again.
Then make in the toolbox the color picker active.
Check the option sample merged, so when we pick a color, we can choose from all the layers.
Click on a bright blue area.
Then we can click and drag the blue color
from the foreground color button into the image.
Make the mode of this layer soft light.
This is just a little bit more subtle then the mode overlay.
Now we can reduce the opacity to about 30, or to whatever looks good to you.
By clicking the eye of this layer of and on we can see the difference.
Press Ctrl+Shift+A to deselect.
As you can see, somewhere during the process there has appearedthe
a soft lining around selected area.
This is especially good visible in the darker areas.
To remove this we first right click on the middle layer and hit alpha to selection again.
Now we go to select and click on shrink.
We shrink the selection with 5 pixels, and click okay.
Back to select and now we click on invert.
And finally we go to edit and hit clear.
Press Ctrl+shift+A to deselect and we can see that there are no more lines.
Hit Ctrl+Shift+J and click on one of the other layers to make the yellow dotted lines invisible.
And there we have our man of steel.
I hope you have fun with this tutorial.
Please do not forget to like and comment, to support my channel.
It is greatly appreciated.
Thank you for watching.


 For more infomation >> 貝克漢婚變傳20年 維多利亞首揭「被離婚」心聲! - Duration: 3:15.
 For more infomation >> | Just Chillin | @KhoaiToo on twitter - Duration: 5:18:01.
Không có nhận xét nào:
Đăng nhận xét