Welcome back everybody. Today I am just gonna show you that the VirtualBox guest
additions have indeed installed, and the machine has indeed booted. So, here it is,
Red Hat virtual machine. I have switched it to full screen mode. If I just go
ahead and take this, there we go. So it says view here. I can switch it to full
screen if I wish to do so, so you don't see any of the differences, so you don't
see the VirtualBox lines and toolbar. Anyway, so let me just go ahead and
minimize it a little bit. The first time when you boot it up like this, when you
login, what I have noticed, and what I've noticed with my previous virtual
machines, is that the VirtualBox guest additions don't load up immediately. So,
login, wait maybe 15 seconds, a bit more maybe 20, something like that, for
them to load. Try resizing your screen like this, pretty sure that that doesn't
have that much effect but something seems to be reloading in the background,
and it does help out. The way I've noticed it, apparently, here it has broke.
I have broken something. Have I indeed broken something? No, I haven't, it does
work. Perhaps the screen just blanked out or something. I couldn't switch the
monitor configuration. Okay, so this is not a big deal here. Anyway, as I said,
just try resizing the screen, wait for about 20 seconds or so, and the
VirtualBox guest additions will inevitably load, or should load, anyway.
Now in this tutorial what I wanted to do with you is show you how you can
actually perform a dual boot of Windows 8.1 and Red Hat. Now this is only valid
for Windows 8.1 and Windows 8. You're not gonna have such difficulties with
Windows 7, or Vista, or XP, or anything of a kind. If you by any chance happen to
have any of those operating systems and if you wish to perform a dual boot,
please do post it in the discussions. I will be more than happy to help you out
and to give you detailed instructions on how to
as that is a lot simpler, but the procedure is pretty much the same. Anyway,
so as I said I will show you three ways how you can set up your environment. One
I have already shown you, how to use VirtualBox and how to install it. The
second one will be how to perform a dual boot between Windows
8.1 and Red Hat. And the third one we will do way later on when I show you the
virtualization process, the one that I talked about where you get 95% native
performance with Xen. I do not want to get into that with you now
primarily because I wish to go over the graphical user interface of Linux Red
Hat, and I wish to introduce you to the Linux command line and a few other
things before we actually get into that. Because that is a bit complicated and
there is a lot of new stuff there, so I'm just afraid that a lot of people
won't be able to follow it through. So, for the time being, I'll stick to the
basics and we will later on move on to the more advanced stuff. Anyway, I'm just
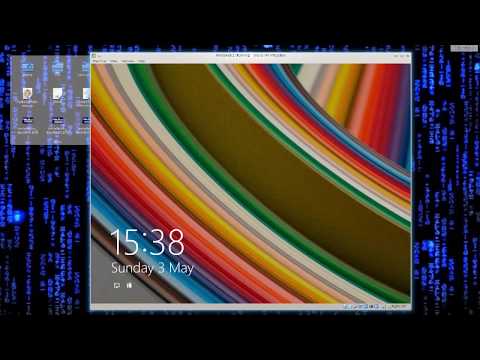
gonna go ahead and minimize this machine. So this is my Windows 8.1 machine. Let me
just go ahead and boot it up, and, yep, there we go. So it is booting, no problems,
Hopefully, yep, there we go. I forgot the CD inside, or
something of a kind, but indeed Windows 8.1 should boot up, I don't know
the boot processes for Windows are fairly slow from what I've seen, but doesn't
really matter. I'm gonna try assigning more resources to this machine because
I'm gonna...oh, I didn't actually do this the proper way. See advanced,
continue. You shouldn't actually see this. But, anyway, I seem to have been messing
around with the machine a little bit so to say, and it's offering me to actually
perform a repair. But, I don't really need a repair, it's gonna boot up no problems
now. Anyway, I am doing the demonstration in VirtualBox of course in a virtualized
environment, but the procedure is exactly the same with the real machines.
Although, there is a downside to this. For this particular method, you
will require two hard drives, and this is basically a foolproof method that will
work on pretty much any device out there. As opposed to some other methods where
you do it in a single drive, and then encounter a ton load of problems. Because,
I've seen so many people complain, on so many forums out there, how Windows 8.1
doesn't play well with other operating systems at all. So I've decided against
showing you other methods, primarily because a lot of problems were
experienced by a lot of people using those methods. So, I just figured I would
show you the foolproof one, the one that is safe, the one that leaves you with the
lowest chance of messing anything up. Anyway, so this is my Windows 8.1 machine,
it is up and running. So this would be an equivalent of your physical machine, and
I'm just gonna go ahead and power it off for the time being because I don't
really need it or want it. At the time, I wish to install another one.
As before, so just shut it down, and as before you will of course need an ISO
file of the operating system which you will burn to a CD.
Once you have burned it to a CD, just insert the CD into your machine and boot
from it. Here's how you do it. So on a VirtualBox I'll of course use virtual
things, in a virtualized environment. Basically, you see the one
that I've selected now? It says controller IDE, it says here empty. Now
if I just select, where is it? There we go. If I just select it it's an equivalent of
you inserting a CD. When I selected this ISO file, it's like it's an
equivalent of you inserting a CD, an installation CD, into your machine and
running the installation from there. Anyway, I'm just gonna click here okay,
and your systems should be configured by default to boot from a CD, so I don't
have to worry about that. If they are not, it's gonna be written in the bottom,
right corner. Anyway, it's gonna be written
there anyway. Like press f12 for Dell, or f2, or something of a kind, to get the
boot configuration or boot set up running. And once you actually press one
of those buttons, it gives you an option like would you like to boot from a CD?
Would you like to boot from a hard drive, from a USB, or from Network? Just use the up
and down arrow keys to select the one that you want and press enter. That is
literally all you need to do. In the virtualized environment I actually needed
to do what I just did. Now, there is another thing that I will do here that
you do not need to do in the real world. You see I have actually created a
virtual hard drive, another one, so you do need two hard drive. See one I have named
Windows 8.1 VD, .VD, and another one is Red Hat .VD. Anyway, if you are doing
this and by any chance if you're curious, or if you want to do this
in the VirtualBox, you just press add a
CD or DVD device...add a hard drive, there we go.
And then you can say create a new disc, we're choosing an existing disc. If you say
create a new disc, it takes you through this process. You just basically click
Next, allot the size, change the name, and click create, that is literally all. And
it will create it, and it will create one just like this one, if you named it
so as well. Anyway, not that important at all for you because you'll be running
this on a physical machine. This is a process for a physical machine. So, dual
booting Windows 8.1 and Red Hat on two hard drives. Anyway, just go ahead and
power on the machine now that the CD has been previously inserted
before the restart, and there we go. We're immediately prompted for an option
to actually install Red Hat Enterprise. We can just go ahead and select it.
That's the first option, not the default one though, because it first offers a testing
of the media. You can run this test if you want as well, but I don't think that
there is that much of a need. The burning software today is relatively good and
performs a lot of check ups itself, and the installation process is en route.
I'm not going to go through it in great detail as I have shown it to you already
before, but there is one segment which I do wish to show you and which I do wish
to explain further, so to say, that would be the
partitioning. It is okay to select the automatic partitioning scheme if you
are using a single operating system or if you're just installing it on to an
empty drive in a virtualized environment, something of a kind, it can be a quick
workaround, but what you really want to do is be able to partition it yourself
during the installation procedure as well. That can be very, very nice.
Primarily because, you can do whatever you want with it. You can create a scheme
that will suit your needs, that will benefit you, that you have deemed
appropriate to yourself. Now we have one disk here, it says ATA VBOX HARD
DISK. This is where the Windows is located, physically. You can
see it says only 3000 kilobytes of free space right next to it. I have a hard
disk, it says almost 100. What? Oh, OK, this
is a, I've already ran an installation on this, but you can see it says here SDA
and SDB, and then you have the amount of space that is free on it. Anyway, they're
both 100 gigs. I'm sure that on your machine they won't be exactly 100 gigs
each one of them. Make sure to first figure out which one you want to use. So
if your Windows is installed on one disk, don't install it there, install it on
another disk. I'm not talking about partitions here, I'm talking about two
separate hard drives that are within your machine. So just go ahead and select
the one that you have chosen. It's not empty, there's something on it. I
don't know, some things that I have previously installed, but doesn't really
matter. I'm just going to go ahead and select it. Please, be very
careful also when doing this. Because if you format
the drive, you're going to lose information, you're gonna lose data,
you're not going to be able to recover it to the fullest of extents. Some of it
you will be able to retrieve, but this is not windows partitioning, or something
like that. Once you delete things with Linux it's rather difficult to
restore them. Even when I delete something in my terminal with a RM
command, it's gone. You just learn to live with it.
Anyway, so as I said, once again, I can't emphasize this enough, please select the
proper hard disk. If you have problems selecting the proper hard drive feel
free to post it in discussions. I will be more than happy to help you out with it.
But, please do not just randomly click on stuff and lose your data. Anyway, to
select the drive all you need to do is click on it, and this mark appears.
You see this one? It appears now and then when I click on it it disappears.
Excellent! So, I have selected the second drive, and I want to select I will
configure partitioning. That option, Excellent! So, now we click on done and
we're gonna be thrown here where we're given an opportunity to actually set it
up ourselves. So, I already have this, and, oh, I have already installed Red Hat here
previously, so we'll just go ahead and delete it all since I'm not interested
in that now. I wish to do it from scratch so that you can actually see how it is
done. So we can have standard partitions, we can have Linux volume manager, and
some other things as well, but I'm just going to go ahead and select standard
partitioning for this. I could actually even select an LVM. And
the first partition that we need to configure is root, your system files will
be located there. So, I need a desired capacity of let's say 20 gigs, so 20 GB. Add
mount point. Excellent! It is created now. I can
encrypt it if I wish. You can create volume groups as well because Linux,
generally, if you have a bunch of disks running under Linux, it just sees them, it
can actually see them as a single hard drive. So it treats, I don't know, two,
three, four disks as a single hard drive, no problems. You get that with the
default installations of Linux which is very nice. And if you go back to the root
directory in Linux you will always go back to root, while going back to the
root directory on Windows usually means selecting a disk where it is
installed, like C, or something like that, and then going there. If this is unclear
to you now, I don't want you to worry about it at all. As we move
in deeper and deeper, when I give you clear examples of this, you will
understand it far better. Anyway, we have created the root partition, and now
we need to create a boot partition for our Red Hat. So...
no, no, wait, wait, wait, wait. Okay, so it gave it the automatic size of 81
gigabytes because I haven't assigned any size to it which is a bit funny. So, let's
just go ahead and delete that and let's create another, let's create it again. So
boot, let's say, I don't know, you can probably get away with 100
MB's, but I'm just gonna say 500 MB's to be certain because, I don't know, I
guess I'm a cautious guy, and I have a lot of space here. Literally, I have
more space than I will probably ever need on this laptop. Anyway, so boot,
root, and now we need home. So home is not, I mean I don't think you
should get any errors, but you should definitely create a home partition. So, 80,
and,
yeah, sure, 80 GB. Pretty sure it's not gonna need that much space there, excellent! Also,
you will notice that it doesn't actually obey me to the fullest of extents.
I've told it 80 and it has created 74.51. Anyway, that's just
how it works. So I have a bit of available space left here, and I figured,
why not, let's create a swap partition. So swap you don't need to create
it, I think I mentioned this, but it's not a bad idea to have it. You're not gonna
get an error message, but you're gonna get a warning message.
Let's put it so. Anyway, I didn't put in any size parameters so it just took
pretty much all that it could take. There's like one megabyte that's gonna
be left there. I suppose you can try tweaking and being extremely precise, and
trying to extract this one megabyte, but honestly why bother. Anyway, I can put in
a label here, you can name it any way you like as well, and no problems there. Swap
will only act as, usually you put it twice the size of RAM, but I mean on
modern systems you don't really need it. Primarily because, you're not gonna run
out of RAM, generally, but you might and then your system actually starts using
your portion of your hard drive as it would use Ram. It's a really slow
procedure, the method is terrible, but, hey, it saves the day when all is taken into
consideration. Anyway, I'm just gonna click here, I got home, root, boot, swap. I'm
gonna say done, and here I get a summary of changes. I
get a type, and what's gonna be destroyed, what's gonna be created, just have a look
at this and make sure none of these discs are are reserved for your Windows.
So, you can see by sdb, if any of them was sda cancel this immediately, but, no,
they're all sdb, excellent! So it's the second physical hard drive. They're
usually sdb, sda, I think the next one should be sdc, and so on and so forth,
depending on how many you have. So here it says what's gonna be created, what's
gonna be destroyed, what's gonna be formatted, etc. So, let's just go ahead and
click on accept changes, and there you go. Custom partitioning selected, all is
ready, and the installation may actually begin. So you just click on on
begin installation. I didn't connect it to the network, but it doesn't really
matter. We can do all the updates, and all the things later on that we actually
want, since we will need to install some software and perform the updates as well.
Anyway, I shall leave you here and later on I'll just show you how the
system boots, and what is the difference between how do you
actually select to boot into Windows, and how do you actually select to boot into
Red Hat. Anyway, until then I bid you farewell.

 For more infomation >> How Will Tariffs On Chinese Goods Affect You? - Duration: 1:42.
 For more infomation >> My skincare routine // how I cleared my skin - Duration: 1:21.

 For more infomation >> 6 household items on you can save big on in September - Duration: 1:31.

Không có nhận xét nào:
Đăng nhận xét