What's up guys, I'm Brent from PrecisionLED.com and here
we have a 2017 Chevy Cruze we'll be performing an LED interior light install on.
Now the 2017 is part of the second generation
so this installation is compatible with all years 2016+
Today we'll be installing on the front map, the rear dome,
the glovebox, the trunk, the license plate, and the reverse lights.
Today we're gonna be installing a PrecisionLED 5730 style LED kit
which come with these three interior trim tools you'll see us using throughout the video.
We have our fork-shaped wedge tool,
our serrated knife tool,
and our pointed wedge tool.
We're gonna start by installing on the front map light.
As you can see, I've already gone ahead and done the install on the two outside lights.
So we're just gonna show you how to swap out the center light here.
We're gonna be using our serrated knife tool in order to access the halogen bulb.
So we're just gonna be wanting to use the flat portion of the tool.
And we're gonna be coming in vertically to the lens here.
And once you have separation between the lens
and the outer casing, you're just gonna pry outward.
And once you do have some separation here,
you can start working on the outside of the inner lens.
And then once everything is loosened up, you can just use your bare hand
and pull the rest of the lens out.
And so now that we have access to the halogen bulb, we're just gonna remove with our bare hands.
But just be careful because if the light was running it could be very hot.
And so here we have our premium 5730 style LED. We'll just pop that in.
Now it's important to note that these LEDs, they're non polarity-specific.
So you can just pop them in any orientation and they should come on.
And everything looks good.
So now we can reinstall the lens here.
We're gonna start by lining up the back tabs in between the fixture and the actual lens housing.
And once those are in place,
just apply a little bit of pressure until they snap into place.
And then you could apply a little bit of pressure on the
front tabs until those snap into place.
Now we're gonna be installing on the rear dome.
And we're going to be using our fork-shaped wedge tool in order to gain access to the halogen bulb.
So we're just gonna be using the fork portion of the tool.
And we're gonna pry in between the lens and the fixture.
And once you have separation, just pry outward.
And once the lens comes loose, you can just work your way down
until the rest of the clips come loose as well.
Now you can try and remove the bulb just with your bare hand,
but it typically is pretty difficult.
A trick, in order to remove the bulb more simply,
is just to take a small piece of tape and you can make a ... sort of U-shape
and then just wrap it right around the bulb,
like so.
And then with the tail end of the tape here,
you can just use that to pull the bulb out of the housing.
And so here we have our 5730 style LED, so we'll just pop that in.
And now let's just test the bulb to make sure everything's working.
So everything looks good.
And now we can reinstall the casing here.
Again, just like the front map, we're gonna line up the back tabs first.
And once those are in place,
just apply a little bit of pressure until they snap into place.
And then you can apply some pressure on the front tabs as well.
Now we'll be installing on the glovebox.
And we'll be using our pointed wedge tool in order to gain access to the halogen bulb.
So there is just one clip that's holding this lens into place
and that's towards the front of the vehicle, right here.
There's actually a small groove
of which you can actually stick the point of the tool inside
and the lens should come loose very easily.
And then once the lens is loose,
you can just take your bare hand and pull the rest of the lens out.
And now we have access to the halogen bulb here.
And so now we're just gonna take the tool one more time,
and we're gonna use it just to pry the halogen bulb downward
so that it comes loose from the connectors here.
And so here we have our LED, so we'll just pop that in.
Again these LEDs, they're non polarity-specific
so you can pop them in any orientation and they should come on.
So now that we can see everything's working perfectly fine,
we can reinstall the lens.
You would just wanna be sure that this switch right here
is facing towards the tail-end of the vehicle.
It will go right here in this groove.
It's the switch that turns the light on and off when the
glove compartment is closed or open.
And so we'll just go ahead and install that in first.
And then once that switch is in place right here,
we can just clamp the back tabs into place as well.
Now we'll be installing on the trunk light.
Again, we're gonna be using our pointed wedge tool
in order to gain access to the halogen bulb here.
Now, just like the glovebox, there's a small groove
in the rear of the tab here.
And once you just stick the point inside of it, the whole lens should come loose
because you are loosening up the only clip that's holding the lens into place.
And once everything is loose, you can just use your bare hand
just to pull the rest of the lens outward.
And again, we're gonna be using the pointed end of the pointed wedge tool
in order to pry the halogen bulb outward.
So we're just gonna be prying from the top of the connection here downward.
And so here we have our premium 5730 style LED, so we'll just pop that in.
And everything looks good. So now we can just pop the lens back in the fixture.
Again, we're just gonna want to make sure that the tab here
it's facing towards the rear end of the vehicle.
Now we'll be installing on the license plate lights.
So there's just one tab that's holding the lens into place
which is towards the center of the vehicle right here.
So we're gonna be taking our pointed wedge tool
and we're just gonna be coming in vertically
in between the tab and the rest of the housing.
And once you're jammed inside of there,
you just wanna pry outward
and at the same time just pry downward.
The lens should come loose.
And next we're just gonna wanna twist this power connector here counterclockwise.
And then just pull out.
And now we have access to the halogen bulb.
So we'll just remove that with our hands.
And so here we have our LED, so we'll just pop that in.
Now before reassembling the casing and reinstalling the bulb,
let's just test the light to make sure everything's working.
So everything looks good.
So now we'll just take the casing right here
and we'll line up these two tabs
with the corresponding tabs in the casing here.
And once the tabs are lined up, we're just gonna twist the power
connector here clockwise in order to lock it into place.
And then you could just reinstall the casing here.
Again, you're just gonna wanna make sure that the clip
here that's holding it into place is towards the center of the vehicle.
Now we'll be installing on the reverse lights.
So in order to gain access to the reverse bulb,
we're first gonna want to remove this outer casing here.
There's a small tab, of which you can just pry down and remove it.
But can be a bit difficult.
So in our case, we're just gonna be using our fork-shaped wedge tool.
So we're just gonna be prying in between this whole casing here
and the actual rear end of the trunk.
And so, you know, once you have separation you could
just take your hands and just pry this casing off.
And next, in order to remove the reverse housing,
we're gonna wanna unscrew this clip here.
Now
now this was
now that was the only clip that's holding the housing into place.
There are a couple more tabs out here
towards the outer portion of the vehicle.
So when you're removing the housing,
you're just gonna wanna press down on these pegs here
and then pull the housing away from the vehicle.
And so now that we have the reverse housing removed from the vehicle,
we can swap out the reverse bulb which is just this one right here.
So we're just gonna twist this power connector here
counterclockwise in order to release the bulb.
And then just pull out.
And now we have access to the halogen bulb,
so we'll just remove that with our bare hands.
And so here we have our LED, so we'll just pop that in.
This LED is very, very bright.
It will increase your reversing visibility
and you'll notice that a lot on your reverse cam as well.
Now before reinstalling, let's just test the bulb
to make sure everything's working fine.
So everything looks good.
And now we'll just take the bulb,
we'll reinstall it into the housing
and we'll just line up the tabs.
And once everything is seated flush,
we'll just twist this power connector here clockwise in order to lock it into place.
And now we can just reinstall the housing.
Now, when reinstalling the reverse housing
you're just gonna wanna be sure that these two tabs right here
are aligned with the corresponding holes that are on the trunk lid.
As well as this peg right here
is plugged into the corresponding hole right here.
And first you wanna ... again first you just wanna line up those two outside tabs
and then pull inward.
And then just line up that peg as well.
And that's the end of the installation.
If you have any questions or concerns,
please email us at help@PrecisionLED.com
or you can reach us online and submit a support ticket
at www.PrecisionLED.com/contact
Now, like we said before,
please like or subscribe if you enjoyed the video
or enjoy the process for what we do.
It really does help us out when we make the next one
knowing that there's people out there watching the videos.
Have a good one!


 For more infomation >> Honeywell QuietClean Tower Air Purifier with IFD Filter - Duration: 11:27.

 For more infomation >> If I Can't Have You - Duration: 42:35.
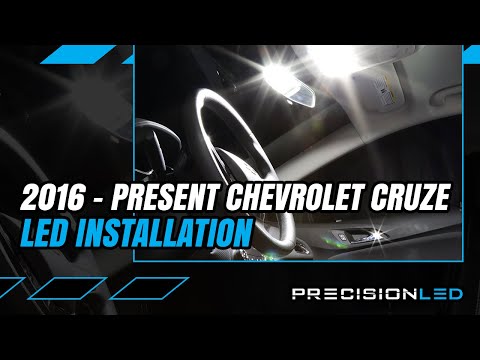

Không có nhận xét nào:
Đăng nhận xét