Thứ Hai, 19 tháng 6, 2017

Waching daily Jun 19 2017

Welcome to Park Fitness

Today i'm gonna show you the basic exercises for beginners with the jumping rope.

Jumping rope improves coordination, speed and agility.

Jumping rope is very good for the most important muscle of your body,you heart.

It's super portable,you can take it with you anywhere you go.

Remember-Never sacrifice good jumping form for speed. Progress slowly.

Double Unders it's not the basic exercise but you can add them when you feel ready

For more infomation >> 10 Best Exercises with Jumping Rope For Beginners - Duration: 4:36.

-------------------------------------------

How to Insert a Tampon for the First Time - Duration: 3:57.

How to Insert a Tampon for the First Time

How to put on Tampon for the First Time

How to put on a Tampon

wash your hands it's important to wash your hands before you insert a tampon so

that you keep the tampon and applicators sterile before you insert it inside your

body you don't want to get any bacteria in your vagina and cause an infection

open the tampon wrapper with dry hands wait until your hands are dry and then

carefully tear open the tampon wrapper on its top and throw it away

it's okay to be a little nervous though there's no reason to be if you

accidentally drop with hemp on on the ground

you should throw it away and start with a new one you don't want to risk getting

an infection just because you didn't want to waste a tampon sit or stand in a

comfortable position as you get more comfortable with using a tampon

you'll give a better sense of which method works for you some women like to

sit on the toilet when they insert a tampon others like to stand and squat a

little you can also place one leg on the toilet or sign of the tub to make your

vagina locally more accessible though it's natural to be nervous you should

try to relax as much as you can

hold the tampon with the fingers you write with hold it in each middle right

at the spot where the smaller inner tube inserts into the larger outer tube the

string should be easily visible and should point downwards away from your

body with the thick part of the tampon pointing up you can also place your

index finger on the base of the tampon in your middle finger and thumb on the

provided grips find your vagina the vagina is between the urethra and the

anus there are three openings which are the urethra where the urine comes from

the vagina which is in the middle and the anus in the back if you can find

your urethra easily then feel an inch or two behind it to find the opening of the

vagina don't be afraid of getting a little bit of blood on your hands that's

perfectly normal

carefully place the top of the tampon into your vagina now that you found your

vagina all you have to do is place the tampon just an inch or so into the top

of your vagina you should slowly push the tampon up until your fingers touch

the applicator and your body and the outer tube of the tampon is inside your

vagina press the thinner part of the applicator up with your index finger

stop when the thin and thick portions meet and your fingers touch your skin

the applicator is there to help you insert the tampon further up your vagina

you can think of this as pushing the inner tube of the tampon through the

outer tube use your thumb and middle finger to remove the applicator

now that you've inserted the tampon into your vagina all you have to do is to

remove the applicator to do this simply use your thumb and your middle finger to

gently pull the applicator away from your vagina the string should be hanging

from your vagina lopunny discard the applicator you should discard the

applicator if it's made of plastic if it's made of cardboard check the

instructions on the Box carefully to make sure you can flush it if you are

not sure it's better to be safe than to throw it

For more infomation >> How to Insert a Tampon for the First Time - Duration: 3:57.

-------------------------------------------

Little Bo Peep Has Lost Her Sheep (கொஞ்சம் புன்னகை) | Nursery Rhymes | Shemaroo Kids Tamil - Duration: 1:31.

For more infomation >> Little Bo Peep Has Lost Her Sheep (கொஞ்சம் புன்னகை) | Nursery Rhymes | Shemaroo Kids Tamil - Duration: 1:31.

-------------------------------------------

Shopping, Pizzas and Kittens | My First Vlog | Evenstar Beauty - Duration: 18:14.

For more infomation >> Shopping, Pizzas and Kittens | My First Vlog | Evenstar Beauty - Duration: 18:14.

-------------------------------------------

Hand Embroidery: Kutch Work Grid Pattern - Duration: 22:23.

Welcome to Raj Creations

In this video I am going to show you the beautiful Grid patten

of kutch work or Sindhi Embroidery, First take a look at graph

you don't have to draw all this thing but this is to show you, you have to just draw these lines

for the pattern. Tthe earlier made lines are the first step of embroidery which I have already made for you

after doing the first step as you can see in the video we have to complete the second step which is another stitch line

as same as the previous one but aligning in between the center of the previous stitches

In this whole grid we have to take these 2 stitches

Now filling part just to show you how thread has to be moved

while doing the third step, in between individual grids 4th step has to be completed

We have to make focus on the turning points and the center intersection points.

The purpose of this video is to show you how to turn and how to make intersection points

Let's get started on fabric. I always use this point as a starting point, just see the thread movement

Now we are doing the first step of grid pattern of kutch work

observe the thread movement, where thread has to be placed after pricking the needle

you will never go wrong, usually I do this without frame or hoops

This is slightly uneasy for me to do this , that's why stitches are uneven

you can try this without hoop just simply wraping particular fabric piece

in you index finger and do the embroidery it is very easy to do this without hoop, just for demonstration purpose I am using hoop

now see the turning point how thread has to be moved

you can also refer to my previous video of Borders part 1( 2 video of channel)

showing the same stitch

this is the first step of embroidery which I am doing

you have to do this with 4 strands of thread but here I am using 3 strands of thread

so that you can easily understand, now making the intersection points where 2 lines are interacting(crossing ) each other

This is important thread has to be in the center of interaction point

In the same manner you have to cover the whole grid pattern

Now doing the second step, while doing the second step once we have to move the thread beneath the

the line and once above the line this is how it goes

see the turning point here we have to turn the thread

this is also helpful when you are embroidering it with borders, this turning point is always needed

when we are doing necklines, side slits and front panels of kurti or suits

This is a multipurpose pattern you can use it in your kurtis, it looks very beautiful in sleeves when making 3/4 sleeves

and also looks pretty in jackets, you can also use this on cushion covers

this is upto you how you are using this grid pattern,

now again showing you the turning point so that you can easily understand

As you can see in my thumbnail pick I have made a very small design

just for showing you I have make this big pattern, It looks very beautiful when it is made in small size

Now doing the intersection point it has to make like this so that you can see a small square pattern in the center line

if you like my videos please subscribe to my channel, like my videos and share it on your social platforms

now from the downwards making the intersection points, this way you have to do on the whole big motiff

Now for the filling part we will do the outline first and do the center(inner) part of the grid line with the 4th step

this way you will find it easy to complete a single grid at a time

Now doing the filling part carefully observe the thread movement

I am using it with different color thread so that you can easily understand

let's see how to do the intersection point

there is an audio problem in my video, I am trying to resolve this very quickly

from now onward I am adding english subtitles in my vidoes so that if you have any difficulty in

the audio you can also play the subtitles to understand the contents what I am saying

I hope you will understand by watching this video

now showing you close the turning point where corner has to be made

If you have moved the thread right you will not find any difficulty in doing this but if there is any mistake

in the first and second step you won't be able to fill the pattern

so, first practice the first and second steps which are the basic building blocks of this stitches

and then try to fill the pattern, you will never go wrong

it requires practice to do this, once you are

able you can do any border stitch

as you have seen in the thumbnail pic i have stitched stones in it you can make small squares

on any other embroidery patterns between the grids so that it looks very beautiful

again another corner pattern for you to know how to make the corners

in this way you have to complete the whole line till the turning point

I have completed the 3rd step of grid pattern, showing you the last and final step

in this step we will fill the inner side all around

after doing the whole embroidery in the inner side at the intersection point you will see a small square pattern

that's why we have to change the direction of thread in the 4th step

now moving towards the turning point

if you have any problem in doing this you can ask me via comment section i will be there to help you

see carefully how to finish the turning point

with the final stitch, that why i have use 3 strands of thread so that i can easily show you

all this, and how thread has to be moved, actually it has to make with 4 strands of thread

if you use 2 or 3 strands of thread than cloth underneath will be visible

to avoid this you have to use 4 strands of thread

try to make equal size stitches to that it look beautiful

in the same manner you have to do this till the intersection point

i like this final filling part very much because the outcome of embroidery project is visible

now moving towards the point which i am trying to show you

if you like my videos please share them, it will be helpful in growing my channel

now watch it carefully

this way from the inner side we have to complete

the forth step as you can see at the intersection point from the lower side another grid is visible

we have to do this till the end, so that i can show you the small square pattern which is visible

in the center, this shows that you have follow the motif right

if the stitches are not right here then something is wrong in your earlier stitches

this is not difficult but you have to follow the simple instructions

almost completed

Thanks for watching my video

thank you please share it on your social platform

For more infomation >> Hand Embroidery: Kutch Work Grid Pattern - Duration: 22:23.

-------------------------------------------

Slay that dragon or be a slave - Duration: 3:47.

Don't let anyone tell you what to do and what not to do

You can get advice but not orders

Make sure that what you do is the product of your own conclusion

For more infomation >> Slay that dragon or be a slave - Duration: 3:47.

-------------------------------------------

Assets vs. Liabilities - Duration: 3:26.

'Accounting' was one of the toughest courses I took during my MBA.

It was a core course, and the professor was tough.

Everyone in my class dreaded failing the course, and to pass you must balance your sheets

--Assets must equal Liability.

But I managed to pass with an 'A.' It was not an easy 'A' because 'Accounting'

or being accountable is not cheap.

If it were so, CPA's, accountants, and our bookkeepers would have no jobs.

The beginning and end of Accounting, as they say, are on your balance sheet.

It is a major financial statement that summarizes your assets, liabilities, and equities.

It also tells your creditors your total worth or gives potential investors an idea of what

your "own" and "owe".

They simply show you as you are; no gimmicks.

God, our Heavenly Father, is your Creditor.

Whether you know Him or not, love Him or not, obey Him or not, you owe Him your breath of

life--an Asset, which became worthless because of sin—a major liability (Rom 6:23).

When you believe God and receive His salvation (Mar 16:16), He becomes an investor in your

life, based on the redemptive work of Jesus on the cross.

He then credits you with His righteousness, so you can begin to build equity—righteousness

and prosperity (Gal 3:6); a major asset.

The process of building spiritual or heavenly equity requires that you own property and

also owe property (i.e. spiritual assets and liabilities).

Your Assets, (i.e., are everything you receive from God—Jas 1:17) should equal your Liability

plus prosperity, (i.e., everything you give away on behalf of God, the Father by faith—Mat 10:8).

Every good and perfect gift is from God, our Heavenly Father (Jas 1:17).

Love, kindness, obedience, money, forgiveness, peace, healing, knowledge, salvation, success,

etc., are Assets from God.

You may have all these, but unless you are giving them away, you do not really have them;

since you cannot give what you do not have.

When you give them away, they become the liabilities and prosperity of your life.

As Jesus said "Freely have you received, freely give" (Mat 10:8).

How much are you really worth in Christ?

Show me your balance sheet, and I will reveal your worth.

For more infomation >> Assets vs. Liabilities - Duration: 3:26.

-------------------------------------------

When Transparency Really Means Tyranny - Duration: 5:23.

When you hear the word "transparency," what comes to mind?

Chances are that you associate the word with a lot of good things, like "openness,"

"honesty," "accountability," and maybe even "integrity."

In a better world, those associations would be accurate.

But in the world of the progressive left, "transparency" means something very different.

And you need to be aware of that meaning or you risk becoming a victim of it.

Everybody – on the left and the right – agrees that transparency in government is a good thing.

With the exception of issues involving national security, the government should be transparent

in its dealings.

The public has a right to know what the government is doing with your tax dollars.

But transparency means something completely different when it comes to the private,

non-government, realm.

Take, for example, where you chose to donate your money.

Transparency in this case means that there is a public record of your donation.

Now, this might sound okay, but it isn't.

Why?

Because it puts you on the radar of your political opponents and makes you a potential target.

Scott Eckern was a theatre director in Sacramento, CA who gave a $1,000 donation to support the

traditional definition of marriage.

Maybe you don't agree with Scott's position.

That's your right.

But the LA Times didn't just disagree, they put every single donation

made by people like Scott online.

Scott Eckern lost his job, and others faced boycotts and blacklisting, all because of

"so called" transparency in an area of life that should be private.

Through most of our nation's history, what happened to Scott Eckern wouldn't have happened:

if you made a political donation, your identity was not exposed.

But under pressure from the left, this is changing.

In New York, for example, it's now the law that if a non-profit organization advocates

against a position taken by an elected official, it must disclose to the government the identities

of all the organization's significant donors.

Faced with this prospect, most people would just as soon avoid the risk altogether.

Safer, in other words, to keep your mouth shut and your checkbook closed.

Even when state officials promise to keep this donor information confidential,

you can't trust them.

In 2015, the California attorney general, Kamala Harris, now a U.S. Senator, demanded

that nonprofits disclose their donor lists to the state, and then her office "accidentally"

posted this private donor information online.

But even if the government kept that information secret, it's none of its business.

Because while transparency is a government obligation, privacy is an individual right.

How do we know?

Because of the First Amendment.

In the 1950s, the state of Alabama tried to force the NAACP, to disclose its membership lists.

This demand came at a time when civil rights activists faced physical threats and economic

reprisals for standing up for basic human rights.

Fortunately, the Supreme Court stepped in and ruled unanimously that the First Amendment

protected their right of freedom of association, and that included protection from prying eyes.

Progressives say we need "transparency" to expose the so-called "dark money" behind

non-profits and political candidates they don't like.

Exactly what those racist bigots said about contributions to the NAACP in the 1950s.

Anonymous speech has been a blessing for this country.

Anonymous pamphleteers helped launch the American Revolution.

Anonymous writers helped ratify the Constitution.

Anonymous activists helped liberate black Americans from the oppression of Jim Crow.

But if we're not careful, anonymity will soon be a thing of the past.

If the message is "you have free speech to address the issues, but only if you don't

care about the consequences," then fewer people will speak freely.

And for those on the left, that's just fine.

In fact, that's the intent.

Here's what David Callahan writes in the left-leaning journal, Inside Philanthropy:

"If the donors can't [take the heat], they can choose not to give."

So, now you're wise to the game.

The next time you hear a politician or an activist talking about "transparency,"

ask a simple question: Who should be transparent?

If he says the government, tell him yes.

If he says you, the private citizen, tell him no.

Your speech is your business.

I'm David French for Prager University.

For more infomation >> When Transparency Really Means Tyranny - Duration: 5:23.

-------------------------------------------

7 Ways Alkaline Water Helps You Stay Healthy ✔ - Duration: 1:07.

7 Ways Alkaline Water Helps You Stay Healthy 1.

Detoxification - Drinking alkaline water helps in filtering out toxins from our bodies.

2.

Weight Loss - If you want to lose extra fat, drink alkaline water.

3.

Bone Health - It helps in tackling bone loss.

4.

Hydration - Alkaline water hydrates our bodies and it also tastes better and sweeter.

5.

Heart Health - It contains Magnesium which is very vital for our heart's health.

6.

Endurance Levels - It fights off lactic acid and helps in increasing endurance levels of

our bodies.

7.

PH Balance - Drinking alkaline water helps in maintaining PH Balance as it helps in fighting

metabolic syndrome.

So what are you waiting for, drink alkaline water and improve your overall health.

Thanks for watching this video, if you enjoyed this video, please do not forget to like and

subscribe to our channel.

In this channel you will get information about various health related topics.

Wishing you good health in your life, bye.

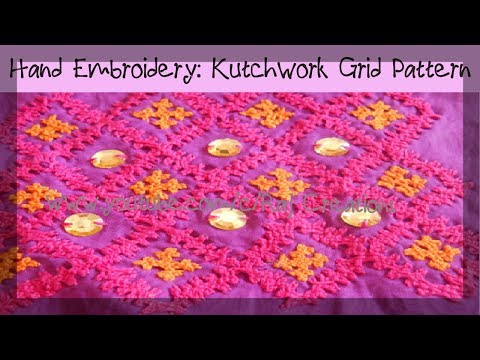
Không có nhận xét nào:

Đăng nhận xét