Thứ Bảy, 29 tháng 4, 2017

Waching daily Apr 29 2017

Hi everyone I'm Tess and tonight I'm

going to show you how to make an easy

and yummy Tex-Mex taco casserole. Stay tuned. (intro music)

This beef tortilla taco

casserole is another one of those budget

meals that will feed a hungry family.

It has lots of Mexican flavors and everyone

will love it! Just a reminder that you'll

be able to find this recipe, the list of

ingredients and much more in the show

more section below. If you have a chance

please check it out.

Let's get started. In a pan on medium

heat I'm adding my ground beef and I'm

using 85/15. Cooking, stirring and

chopping for five to seven minutes until done.

If you're using a fattier ground

beef you may want to drain some of the excess fat.

Now I'm adding some diced onions,

bell peppers and , this is optional , a

seeded jalapeno pepper for a little heat.

Lots of minced garlic and some salt and

black pepper. Cooking and stirring for

two to three minutes.

Next are the seasonings. Adding in some

taco seasoning and, you can use your

favorite brand,

chili powder, oregano, garlic powder and cumin.

Cooking and stirring for a minute

just to get all those flavors combined.

In goes a can of diced tomatoes and, you

can use Rotel which is diced tomatoes

with green chilies, adding in some salsa

and, just use your favorite salsa. Giving

that a good stir to combine.

For more flavor and texture I'm adding

in some corn and a can of black beans

that I rinsed and drained. Again, giving

it a good mix to combine and letting it

cook for another minute.

So let's put this casserole together!

I have my oven preheating to 375 degrees .

I crumbled some tortilla chips on the

bottom and I'm adding just a couple

spoonfuls of the meat mixture. Next are

some flour tortillas and I'm putting

them in the way they fit and cutting

some into strips so they fit in the

corners and the sides. It doesn't have to

be perfect.

Spooning out another layer of the meat

mixture which is about half of what I

have left. Sprinkling the top with some

chopped green onions and we can't forget

the cheese! I'm using some grated cheddar

and mozzarella cheese because that is

what I had. You can use any cheese that

you like. I've also used jalapeno pepper

jack cheese which really gives this taco

casserole a little kick. Down goes

another layer that flour tortillas...

spooning and spreading out the rest of

the meat mixture and now I'm adding some

spoonfuls of sour cream.

I think the sour cream really adds a

creamy element and brings this taco

casserole together. You don't need much.

More chopped green onions and more of the

broken tortilla chips. This taco

casserole definitely has lots of flavor

and texture. Topping with the rest of the

cheese and garnishing with some sliced

olives and jalapenos. These are optional

but they add additional flavor and decoration.

Bbaking at 375 degrees for 30

minutes or until the cheese is golden

brown and bubbly. It's been 30 minutes

and it smells amazing! Letting it rest

for 15 minutes before serving. This taco

casserole will feed 6 people very easily.

I love all the flavors and textures.

It definitely is comfort food. I hope you

give this Tex-Mex taco casserole a try..

and enjoy

If you like this Tex-Mex taco casserole

recipe please hit the LIKE and SUBSCRIBE

button. Remember to hit the "BELL" next to

the SUBSCRIBE to make sure that you get

my future video recipes. You can also

find me on Facebook and at my website.

Feel free to SHARE this recipe and my

channel with your friends and family.

And until next time... Much Love!

For more infomation >> Easy Cheesy TACO CASSEROLE Recipe ~ Tex Mex Ground Beef Casserole - Duration: 4:34.

-------------------------------------------

How to create transparent 3D prints! - Duration: 13:04.

I wanted to make something clear, but the problem is that typical 3D prints, even if

you use clear filament, just come out milky white tone instead of being properly clear.

They diffract light too much, so while the light still passes though, it gets bounced

around inside the parts and scatters, which creates that translucent, but not quite transparent

look.

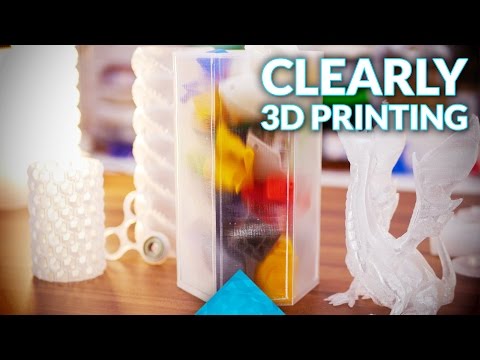
But Colorfabb have had this article online for a while where they are showing off incredibly,

impressively clear prints.

I've done a lot of printing and I think I'm ready to show you how to reproduce these

prints yourself.

Okay, let's see, Colorfabb were using their HT filament for this, which is Eastman's

Tritan, so I believe it's the same material that Taulman used to make, just plainly called

Tritan, too.

But the key here is that it's a copolyester, so a material that is very closely related

to the common PET and PETG materials.

In general, those are plastics that like to fuse together extremely well, so they turn

into one solid piece of material instead of keeping those layer marks when you look through

the print.

I do have the Colorfabb HT filament here, but I wanted to see how well just a standard

PETG would do, so I did all my experiments with the inexpensive DAS FILAMENT PETG, but

I'm sure any other clear polyester filament is going to work basically the same for this.

I had two different use cases here, the first one being these solid parts like Colorfabb

showed that just look like they are one single, solid block of plastic with basically invisible

layer lines on the inside and outside, at least that was the goal, the other one being

vase-like structures that have no infill, but only provide a shell, in my case, to scatter

light.

I was specifically looking into this for use as diffusers for lamps of various types.

And I think I pretty much achieved that.

But let's start with the solid parts.

My test subject here is a spur gear from Daniel Noree's OpenRC F1 design, it's got some

relatively complex surfaces on the side, large flat areas on the top and bottom and this

hub that is a bit of a smaller element where you'll be able to see the light shine through

from the top and the sides.

I know, it's not the most realistic design for something that's supposed to look good,

but I think it's a great object to tune in the process.

Plus, I've now clearly got plenty of spares for when I start building my first OpenRC

models!

I'll probably reprint these from ABS or Taulman 910, though.

So the first print was done with settings that I thought would make sense - I used 300

and 350µ layers, 100% infill and regular temperatures.

But if you look at the part printed with those settings, it is translucent, but it is not

transparent.

Yes, you can take a flashlight and shine it through and the part will glow, but it's not

nearly as transparent as the samples Colorfabb showed.

So the first idea was to increase flow, to close what looked like tiny gaps between the

extrusion lines, so I upped the extrusion rate to 105% first, and seeing that that improved

things a bit I tried again at 110%.

And if you compare the original part at 100% flow and the new one at 110% it is already

a lot more transparent, but we can also see that it's starting to show over extrusion

streaking on the top surface.

So at this point, the amount of material seems like its correctly filling every gap, but

the rest of the print settings could probably still use some work.

So I tried the other extreme, going with 50µ layers, and that immediately helped a lot.

I think because the hotend now passes over the same spots more often and sorta irons

down the tracks more, we're fusing the individual extrusion lines together more tightly to turn

them into an actual, single block of material.

In fact, if you look at this hub part that I accidentally broke in half, you can see

that both the surface where it broke and the inside of the part look like one single piece

of PETG, looking at just the crack, you'd be hard-pressed to tell this thing was 3D

printed at all.

So next up, I tried increasing the material flow on the 50µ prints and increasing the

layer height from 50µ to 100µ, and both improved transparency a bit.

The 100µ print was done with more perimeters, so you can see how those scatter light differently

than solid criss-cross infill, but overall it didn't look like that different from

the 50µ prints other than the top surface being a bit less smooth and now looking more

like it was overextruded..

The 50µ prints with more material I think were the best ones of the entire series, where

the one with a total of 15% extra material looks, I think, extremely good, while the

one with 20% extra is a bit too much and started to get quite messy on the top and side.

It also has these fuzzies between the gear teeth where the nozzle was scraping off the

extra material on each layer.

For some reason, at the time I thought the 100µ prints were pretty much just as good

as 50µ ones, so I kept on printing parts with that setting.

Looking back, I probably should have stuck with 50µ.

Anyways, these two benchies were printed with 110% flowrate, but this one got a bit of a

temperature boost, hoping that would help with everything fusing together.

But instead, it turned out that the higher temperature actually decreased the clarity

of the part and had a few other negative effects on quality.

It's a bit easier to see what exactly is happening when you look at the gears that

used different temperatures , and you can see that, with a higher temperature, the PETG

actually sorta starts cooking and bubbling, and we'll see that effect again in a second.

In the main section of the gears, the higher temperature is fine and slightly improves

clarity, but up here at the hub, where the printer slows down so that it doesn't pump

too much molten plastic onto one area in too short of a timeframe, up here you can see

the plastic getting extremely cloudy.

That's because when the printer slows down, the filaments is sitting in the heated zone

of the hotend longer and gets more time to heat up, cook and degrade.

So to avoid that, either disable the cooling slowdown in the slicer or just print at a

lower temperature overall.

I think this Benchy does look really good and shows off the transparency or translucency

really well, but it's most visible when you look at the top and bottom of the parts,

since it's almost like the low layer height makes the side surface somewhat milky.

Maybe I should try with an even lower layer height at some point, 10µ or something, but

I'm pretty sure the Prusa i3 MK2 is not up for that without dropping in a new extruder

and some lower-pitch Z-axis spindles.

The stock setup has a physical resolution of 20µ, considering that the half-step position

is the only microstepping angle you can really trust.

But let's get back to these parts.

I also tried to improve the surface by either flame polishing it with a hot air gun set

to 600°C or sanding it beforehand, but with the hot air gun, this unsanded spinner started

bubbling and softening up before it started getting more transparent, so that part's

gone, and when I tried to sand a part beforehand, yes, it did ultimately get a bit clearer,

I think, after I heated the surface that was sanded to 1200 grit, but again, it's really

hard to find that optimum spot where the plastic neither bubbles nor softens up too much.

But one nice thing you can do with heat, actually for any filament, is to melt off the little

hairs that PETG in particular likes to pull when the hotend moves from one area to the

next.

High heat and a single pass are usually enough to take care of them.

And one last approach that didn't really work with the Benchy was the thicker layers

at 300µ, even with the extrusion multiplier cranked up, it did not turn out transparent

at all.

Though print quality overall was a bit more consistent compared to the low-layer-height

parts.

So to recap for solid prints: With polyester filament, use a low layer height, 100% infill,

obviously, and tune the extrusion multiplier so that you're getting maybe a tiny bit

of overextrusion.

Higher temperatures can help, but it's really easy to cook your filament that way.

Post-processing prints to improve the surface is hard to do right, at least with heat.

Maybe those thick coatings can help here, I've played around with spray-on clearcoats

before, but they didn't improve things at all.

Awesome, let's check out how these parts were printed.

These are all single-wall parts, most of these you could print with vase mode, which is a

print mode that turns the entire print into one long extrusion line, instead of having

discrete layers, it just continuously keeps moving the hotend up as it lays down plastic,

so it's one long spiral.

However, this shroud does have a ridge up here, which usually can't be printed cleanly

with vase mode.

But that's not the point here.

Let's start out with what makes these parts look better or worse than others, and essentially

it's the same thing again.

It's refraction wherever light transitions from one medium into another, and here, that's

from the air into the plastic and back out.

The layers act as tiny lenses because they have that round section on their end.

That's why this part right here will blur things in the vertical direction, but not

as much horizontally.

For example with this shroud, I tried to use that effect and create tiny microlenses that

would also diffuse light horizontally because this is supposed to be a diffuser for a lamp.

You know, you have these individual LEDs and just seeing each one through a clear shroud

doesn't make for a very attractive lighting setup, so I have all these parts that create

different diffusion patterns.

Most of these were printed with 300µ layers, because if you compare it to the the one printed

at 100µ, they are so much clearer and crisper and less hazy white.

Of course, using thick layers and only a thin shell like this means that these parts print

incredibly quickly and use very little material.

This one was printed with just 25g of PETG in 45 minutes, that's hard to beat.

This little one I printed with a thicker extrusion width.

But I can tell you one thing that doesn't work, and that is leaving the printer at over

600% speed for the wrong file, I mean, it did get the print done super fast, but clearly,

it's not quite what I wanted.

So typically, with a .4mm nozzle, you're going to set it up to lay down like 0.42mm

wide tracks.

Here, I went with a full mm, so two and a half times as wide as the nozzle, and while

it's not the greatest thing to do if you want overhangs and details to come out great,

I mean, you should be using a thicker nozzle, this part still came out looking great.

It's not quite as clear, instead it's very glossy if that's the right word, but

that might be due to the structure, too.

It's definitely better than using two individual perimeters, which would introduce that second

interface where you'd potentially end up with more diffraction.

Also, it's very strong and stiff, as expected, but I did crack the bottom when I tried to

remove it from the PEI bed, PETG, as usual, likes to stick to PEI a bit too much, so usually,

I'd recommend using a liquid surface finish on top of the PEI that doesn't stick quite

as much, so something like Printafix, or Magigoo, or maybe Glue Stick if you can apply it evenly.

But this technique of just using a single wall isn't great for every model.

This Adalinda frog does come out really nice looking with those thick layers, but wherever

there's a slope on the surface, the extrusion lines just get super droopy, like on the back,

near the tail or on the wings.

I did configure this print with two solid layers on top and bottom and turned off any

features that backfill surfaces, which would avoid these exact issues, but would also create

these structures on the inside that just don't look great if you see the way they diffract

light shining through it.

Alternatively, you could print it with a solid infill and thin layers, but that would use

up a lot of material and take a long, long time to print.

So that's how I printed these transparent / translucent parts.

I think they turned out great, especially these single-wall prints, they are going to

look awesome installed somewhere with some light in them.

If you learned something, click that thumbs up, get subscribed if you aren't already

and whether you've freshly subscribed or have been for a year or two, check that you

have that bell toggled so that YouTube sends you notifications as soon as a new video gets

uploaded.

Kickbacks from affiliate links help me run this channel, so if you want to try printing

some clear stuff, too, there are is a link to ColorFabb's HT material that will take

you to the right shop for your region, also, to the DAS FILAMENT PETG, that's not an

affiliate link, I just like the material, it's cheap, it consistently prints well,

what more could you want.

If you're going to be shopping on Aliexpress, Matterhackers, Amazon, eBay or iGo3D, check

out the shop links to them from the video description.

Or if you want to directly support what I'm doing here, head over to Patreon to chip in

a dollar or two per month, or more, I'm not going to judge you, that is always appreciated

and you'll be invited to join an exclusive live Q&A hangout as well.

So thanks for watching, and I'll see you in the next one.

For more infomation >> How to create transparent 3D prints! - Duration: 13:04.

-------------------------------------------

The Flash 1x12 Extended Promo "Crazy for You" (SUB ITA) - Duration: 0:31.

We're in our 20s. We should meet people, go on dates.

Aren't you worried about moving too fast?

Catch me, if you can.

It's an emergency. I'm so sorry.

I'll call you.

It's super cool.

You are a crime-fighting lady-slaying machine.

YOU'LL FIND THE ITALIAN SUBTITLES EVERY WEDNESDAY ON www.traduttorianonimi.it

For more infomation >> The Flash 1x12 Extended Promo "Crazy for You" (SUB ITA) - Duration: 0:31.

-------------------------------------------

The Flash 1x12 Promo "Crazy for You" (SUB ITA) - Duration: 0:20.

- We're going on a date tonight. - Aren't you worried about moving too fast?

It's an emergency.

I'll call you.

You are a crime-fighting lady-slaying machine.

YOU'LL FIND THE ITALIAN SUBTITLES EVERY WEDNESDAY ON www.traduttorianonimi.it

For more infomation >> The Flash 1x12 Promo "Crazy for You" (SUB ITA) - Duration: 0:20.

-------------------------------------------

Prey gameplay | M.Yu's Experiment - Duration: 53:06.

Let's do this!

Let's go with easy for a bit

Yes I am a noob don't judge me!

Of course we will go with male because I'm a man

Not trying to be sexist

Let's skip up a bit

This voice reminds me of the robot of portal

Ahh just getting fucky

Is that a Nokia?

Who are you, my brother, my father, McDonald?

Ok we are starting as a vimper

I can open it but not close it, WFT?

Let's put some clothes on!

Morning...Patricia

Ok

And of course we have the elevator music

How does everyone know my name?

Cool view

They could just title the name of the studio on the mountain and not on to a f#cking bridge

That's a excessive logo right there

Thanks for reminding me that I playing Prey

Hi hovering thing...

Confirm I guess?

Can I play angry birds on this thing?

Hi McDonald

I don't know, I'm a f#cking vimper

Which tests?

OK

Like I said OK

This is my brother?

I'm just scared of You that you're my brother!

What does this button do?

Hi doc

What kind of test are you talking about?

What kind of stupid test is that?

Bahm naild it, what now?

How did I mis that giant A?

Can you see me now?

Ok yes you can

Oh the chair of corse

Let's do this

So next room I guess

So button clicking

The door is not opening

Ohh there we go

Cool PC

New for exploration

No I'm happy as hell

1 is better than 5 I guess

Punch McDonald

Again McDonald

Ahh we both hate McDonald that's cute

Yeah I thought that I saw one cup

Oh hell noooooo...

And I screwed up some how

And resart, great!

I swear that could be a future nokia

Ohh cool a PC

WTF!?

What is EOM?

Let's... NOT DO THIS

Where is,the exit?

Let's try the balcony

This is not the balcony

Why does he even have a password?

To late b#ch

How do you fail to install something?

Ok moving on

What is this place?

Why is the music changing!?

Cotcha b#ch

This is so creepy

Come here you son of a...

Eewhh

Cool medkit

RIP Patricia

Looking for something?

F#ck you!

Useless PC

Nothing useful here

Come here you...

Finally

What the...

There it is

Let me just check that I didn't forgot of something

What?

OK

What is this?

Ooohhh a freeze gun

Gotcha

Pore guy, so moving forward

WFT?

OK consertrait there are only 2 of them

OK let's take this guy first

Ok that's it

Let's take this first

Cotcha

Let's take..shall we

That explains the red eye

Holy shit

What the... shit shit shit

This is a restroom some privacy please

At least I got a free energy drink

Well use our medkit and the drink to get some strength back

Back to action

Ahh come on

Let's see if I can make it past that door

Skip that loading screen shall we?

Cool a shotgun and a medkit exactly what I need

And 2 upgrade thingis...I forgot how you call them

Does it begin with a N?

Human Resources?

Moving on

The hell is that

This is really a bad scale of the moon and the earth

But still cool

let's keep moving before alien will suck our brain (yeah I know zombies eat them)

left or right?

left

the background music is changing, that's not a good sign

let's look at the map so know where we have to go

our objectif is on the 3th floor...

Who's talking?

ohh the turrent, nice

at least I am not the only one going trough this

let's place you here shall we

finally deployed

SHIT

Shit not much ammo left

and the turrent isn't looking good

ok so...

let's go here

or not

cool a exhibit

what's in the back?

Americans and Soviets? you don't here that often

attempted?

how did they lose there lives?

ehh John F. Kennedy

mhhhh 1917-2031sure

let's take a look where we are

well that was useless

Yeah I am going with hacking

come on come on

let's try some codes

hacking then

made it

something doesn't feel right

shoot shoot

come on you...

bye have a great time

where the f#ck did he go?

there is one...

hmm shall I go for it?

yeah f#ck this

come on you...

I am in a middle of a fight

no no not the big one

F#CK...

damit

and Fell throw the floor

le't try that again

come here you...

that was 2

and that was 3

moving on

shit I have to go throw that monster

let's get some health

ok there it is

(I made a big mistake)

come on you

ohh he isn't moving anymore

nice stuff

nothing here I guess

going to the other side then

every thing is still "normal"

or not

there is a turrent that's good

let's see what we got here

seriously omg hot boss?

ok then

0451 gotcha

ohh I don't even have to remember it

my office he...nice

let me just explore something

let's take everything

and the medkit

not bad

how do I still remember my password?

but I can't remember the rest

ohh a handgun

what the...

At least now I know how I look like

GREAT

Ok thanks for the tip

say whaaaat

ohh

wow

how's Alex?

ahh come on...

thanks McDonald you just earned you're titel back

well then come here you...

FINE

OK, thanks

there we go again

moving on

holly f#ck

Is that it?

WTF!

you sneaky b#stard

MORE?

come on I can do this

finally

I will keep it there

(because I can't go further)

I hope you guys enjoyed it and don't forget to leave a like

and how you think of the game

see you next time

bye

For more infomation >> Prey gameplay | M.Yu's Experiment - Duration: 53:06.

-------------------------------------------

✅ SKULL JACK O'LANTERN makeup tutorial WOLFE FX body paint (Speed-painting) in 4k- Witte Artistry - Duration: 1:40.

*Humming*

Da DUH!

Strawberries were a good choice.

For more infomation >> ✅ SKULL JACK O'LANTERN makeup tutorial WOLFE FX body paint (Speed-painting) in 4k- Witte Artistry - Duration: 1:40.

-------------------------------------------

Farming Simulator 17 Ground Modification - Duration: 11:30.

HI GUYS !!!! Welcome to Farming Simulator 17 Mods Channel in this video I will show You a new tool you can use to decorate your farm Th e Ground Modification Roller.

LIZARD R 5000 Ground Modification Roller Colorable

To test the Ground Modification Roller I use the Deutz Fahr Agrotron 120mk3 It is not perfect but it is functional

Deutz Fahr Agrotron 120mk3 Front Loader 3 Wheel Setup 165Hp

You can oped Doors Back Window And Sunroof With NUMPAD 4 7 8 9

You can use the LIZARD R 5000 Ground Modification Roller to make roads fields or decorate the farm with different Ground textures

V KEY LOWER THE ROLLER X KEY REMOVE GRASS Y KEY CHANGE GROUND TYPE Z KEY CHANGE ANGLE

They are 19 types of ground you can create with Ground Modification Roller

You can remove the modification you have done if you select original ground option

If you enjoy watching my videos... Give thumb up SUBSCRIBE FOR MORE And for any question ( or just for say HI!!) LET comment I will be happy to answer you...... bb

For more infomation >> Farming Simulator 17 Ground Modification - Duration: 11:30.

-------------------------------------------

Ro School Killing Game (50) - Duration: 0:44.

Assistant Principle: Ooopsiee Looks like you made a mistake! Having trouble debating? hehehehe

Larbin: Crap that was wrong I shouldn't have let emily to counter him!

Larbin: What did justin said say again?? I can fix this

Larbin: Hmmm but albert Do have alot of friends to be with! Randy can counter that!

You ready to try again?

For more infomation >> Ro School Killing Game (50) - Duration: 0:44.

-------------------------------------------

What Noise Does A Bug Make? - Duration: 4:04.

(playful music)

- [Teacher] Alana, what noise does a cat make?

- Meow?

- [Teacher] Very good!

Graham, what noise does a cow make?

- Mooo.

- [Woman] Excellent!

Petey, F-what noise does a bug make?

(loud rip)

- [Petey Voiceover] F-what kind of stupid-ass question

is that?

Last I checked, bugs don't make noise.

This is some Zen Buddhist koan about one-hand-clappin'

John Cage 4'33-type bullshit, am I right?

(babies cooing)

- [Teacher] Wanna give it a try, Petey?

(horror music)

- [Grasshopper] Hey, kid.

(oriental music)

Woof.

- [Teacher] Come on, Petey.

Give it a try.

What noise does a bug make?

- Woof.

- [Teacher] Aww, Petey, you're just not getting

animal noises, huh?

(crying) - [Petey Voiceover] What?

Are you kidding me?

I nailed that.

- [Teacher] Okay, maybe somebody didn't get enough sleep

in at naptime?

(cage closing)

(lullaby music)

(oriental music)

- You!

Why'd you play me like that?

I said what you said and got it wrong.

(smooth jazz)

- I said, "Woof," because the What Noise game

is a real zonk to the head.

- Huh?

- They're not teaching you to speak.

They're teaching you to categorize.

Not all bugs make the same noise, ya dig?

Maybe this little buggie just wants to woof.

- I think it's fun to go "woof."

- See, that's thinking for yourself.

And teachers should be teaching you how to think.

Not how to recite back the answers they wanna hear,

Patty Cakes.

- I like to play Patty Cakes.

Wait.

Am I a conformist because I like to play Patty Cakes?

- If you like Patty Cakes, play Patty Cakes.

But don't play Patty Cakes because they told you

to play Patty Cakes, you dig?

- Umm... yeah.

I dig.

- Just because someone is in a position

of authority, it doesn't mean they have all the answers.

- Even you?

- Like the Buddhist said,

if you see me on the edge of the windowsill,

squash me.

- Okay.

Squash bugs.

- Metaphorically.

- Right.

Yeah, I knew that.

- And if you wanna say "woof," say "woof."

- Woof.

- Also.

Chemtrails have chemicals that the government

sprays from aircrafts to control the populous.

Good bye!

(mysterious music)

- I learned more in one session with that bug

than I've learned from all of the iPad

object permanence games my parents downloaded from me,

combined.

Not the chemtrail stuff, all the stuff before that.

About not letting school get in the way

of your education and stuff.

- Hey!

Baby.

Before I go, there's one more thing I think you should know.

Always, and I mean always be sure t-

(squish)

(baby crying)

- [Mother] Oh drat.

Where'd it go?

Did I get it?

(baby crying)

(oriental music)

(baby cooing)

- [Mother] I dunno if I got it.

Did I get it?

- She didn't get it.

Some people never do.

(inspirational music)

- Yoo-hoo...

(rolls tongue)

(oriental music)

Không có nhận xét nào:

Đăng nhận xét