Celebrate Raksha Bandhan Across Boundaries
Celebrate Raksha Bandhan Across Boundaries
Celebrate Raksha Bandhan Across Boundaries
-------------------------------------------
Perfect Cottage Cabin From Kanga Rooms | World's Most Beautiful Cottages - Duration: 4:46.
PERFECT COTTAGE CABIN FROM KANGA ROOMS
-------------------------------------------
Top 10 Unmarried Bollywood Couples of 2017 - Duration: 5:41.
Top 10 Unmarried Bollywood Couples of 2017
-------------------------------------------
Tips For Faster Beard Growth at Home - Beard Growth Home Remedy - Home Remedies For Beard Growth - Duration: 4:15.
Tips For Faster Beard Growth at Home Tips For Faster Beard Growth at Home
Tips For Faster Beard Growth at Home Tips For Faster Beard Growth at
Home Tips For Faster Beard Growth at Home
Tips For Faster Beard Growth at Home Tips For Faster Beard Growth at Home
Tips For Faster Beard Growth at Home
-------------------------------------------
Revealing the Truth about Colours in TV І LG Nano Cell TV - Duration: 2:50. For more infomation >> Revealing the Truth about Colours in TV І LG Nano Cell TV - Duration: 2:50.
 -------------------------------------------
Learn Python Episode #6: Choosing an IDE - Duration: 8:14.
Alright, so what kind of work environment do we need to be efficient at
programming with Python? The question can be posed for any programming language
really, and so the answer is usually going to be same.
I mean feel free if you want to, to open up notepad on Windows or you know some
basic text editor and write a script and go over to the terminal and command prompt
and run it, however that's not efficient for a variety of reasons.
So, what we're going to be using is an IDE, which stands for integrated
development environment, and we're going to be using Jetbrains PyCharm. Now,
PyCharm is free for, I spelled that wrong
just go to Google, search PyCharm, and click on the link there which is from
jetbrains.com, and you can download it. Now when you get to the download screen
you're going to get a professional or community version, choose the community
version that is free, it's completely fully featured as far as i can tell, and
that's the one that we're going to be using in this video. Now
alternatively I mean you can go have a look at other IDEs for Python, but I find
that this one it just works really well, it's simple, and it does everything that
we need it to do, and it also has some advanced features which we may look at
some point in the future. So, go ahead download the installer for your platform,
it does require Java as well, so you can just open up Google and type download
Java, and it's going to take a java.com/download if you click that link, just
click download the appropriate version for your system, and once you
have that installed then you can install PyCharm. So, let's take a walk around
PyCharm right quick.
So, this is going to be the first screen that you see every time you start up
PyCharm. The first launch screen is a bit different you can choose a theme and
whatnot,
all that is relevant really. We're going to create a new project, it's going to be
pure Python, now there's also other options here if you want to start a
Django project, etc., but we're just going to start a Python project here and we're
going to choose version 3.5.1 which is also going to tell the IDE
here where to find the binary files to run Python. Now, we're also going to name
the project here, so first program, and this is going to be the name of our
project. It's going to create a folder called first program and this is how
we're going to identify it within here. So, along the left-hand side here this
is the project view so let's go ahead and right click and create a new file.
Now,
additionally you can create a new directory, a Python package, and a bunch of
different file types here. We're just going to choose a Python file and i'm going to
name it main, which is going to name it main.py, and here we can start typing
our script. So, again i'm just going to use the hello world example, and that's
all it's going to be. I'm going to save it, keyboard shortcuts are going
to take you a long way if you're going to become a programmer, so I expect you
know some already, if you don't on Windows Linux control + S saves the file
and on OS 10 its command + S so you don't have to always go through the menus and
stuff, but let's have a look through the menus. If you want to create a new
project, a new file, or directory you can open one etcetera, you can actually
access the settings by going to default
settings for this project, and a bunch of different options down here that we
don't really need. If you go to edit you're going to see you can undo and
it's also going to show you the corresponding keyboard shortcuts for
each one of these options, so this is command + Z and that's going to undo
whatever action I previously did, this is also going to be useful if you're going
to become a professional programmer. Same is true for copy, paste, find. We're going
to be discussing find at some point, I mean it's a pretty powerful command you
can find not only in the current file but your entire project if you want to
look for instances of variable or string or something you can actually search
through the entire root directory of this project if you want. If you go to
view and go tool windows here
is what we're looking at here project if we select that it's going to,
it should hide that, yeah, so it hid the project sidebar, so we're going to leave
that open. Now, we can also show favorite structure, etcetera. If you have version
control setup this will not be disabled and you can use that to perform first
control actions.
We're going to open up a Python console here and here we can actually run Python
code. If we wanted to say 5+5 you know and it's going to return that so this is
the interpreter itself, however if we want to actually open terminal we can
open a terminal here and here we can just type python3 main.py and it's
going to run what we have up in this file right here. Now additionally we have
a run right here. We can set up run, a run configuration here, to actually every
time we hit the run it's going to automatically run our projec,t so let's
go ahead and hit the plus sign, choose python,
and it's gonna be called a Python run, script is going to be python3 or the
script is going to be the the actual python script that we want run so it's
going to be main.py, script parameters this is if we're passing in any arguments or
anything we're not going to it's already found the Python interpreter because
when we set up the project we chose the correct Python version. This is going to
be interpreter options we're not going to be using any, and that's all that we
need to do. So, let's go ahead and click apply and then run, and it's going to run
the script, output that, and then it says it finished with exit code zero which is
completely normal.
So, every time you want to run if you have this little section opened here
just hit that play button, the Run button there, it's going to run the code
in real time. So, make changes, hit ctrl + S, and then run the code right there, this
is the most efficient way to run a program in an IDE, you know, you don't have
to switch back and forth between windows and stuff. So, this is the primary reason
that we're going to be using this IDE for the sake of this course. Again, feel
free to have a look at some others but I recommend if you're a complete novice to
any of this
just follow along exactly with what I'm doing and you shouldn't have a problem.
However, if you do there's a discussion section to the right of this video, use
it, let me know if you have any trouble, and I'll try to clear it up.
So, with all that said we are finally ready to actually get in to the language
itself.
I am off to the North East
But I do not have a tour plan
Let's see what experiences
this first solo unplanned trip gives
Hi, Day one
I have come to Guwahati and taken a room here
Now I am going to see the Holi celebration in Assam
Holi celebration is quite similar everywhere
But Holi's cannabis looked different here
Today I am going to attend the biggest Holi celebration in town
Cycle is heavy, isn't it?
Where are you from?
Mumbai
Cycles are recognized as Rickshaw here
Oh... It is called as Rickshaw
Driver got angry as I called his vehicle, cycle!
As I got out of his Rickshaw cum cycle
Uncle narrated his sorrow near the River Brahmaputra
Celebration helped me to get rid of his pain
After enjoying Holi songs, flying colors and drunken people, I left the place
Just now I came from fancy bazar and paltan bazar
Dry holi is played here
I have to clean these colors
Its 12 PM now, and I have to pack my bag
Checkout time was 12 PM
It's 1 PM now and maybe I am going to Shillong now
As I left the hotel, this uncle drove me for almost half an hour
I have finally managed to get rid of this driver and rode the car for Shillong
I took shillong city tour to save time
Driver showed me just 2-3 places
This is sacred forest
Many herbal plants are found here
After the jungle safari, I have come to elephant waterfall
City's most beautiful waterfall
Good morning
Day 04
I have been staying in Shillong
now I am visiting a museum
I am taking local transport to reach the Don Bosco museum
This huge 7 floor museum
depicts the history of 7 sisters that is 7 states of North East India
Right from Stone Age to the local people
their language, their clothing style, their culture
even the countries around these states are represented here
which helped me to know more about the north east
Seeing which I am now looking forward to my next ride
Let's see the rainiest place in India – Cherrapunji in the next episode!
-------------------------------------------
Top 10 Unmarried Bollywood Couples of 2017 - Duration: 5:41.
Top 10 Unmarried Bollywood Couples of 2017
Ten jobs that make you gain a crazy amount of weight
The following jobs can increase your weight because they
can affect your sleep, stress levels, and physical
activity.
#1.
Bus/taxi driver
Bus and taxi drivers can work not only during the day but
also during the night and have to spend most of their time
sitting.
#2.
Night shift custodian
Being a custodian is hard work, and multiple
responsibilities and physical work can be stressful.
Add an
overnight shift to this type of work, and you can also get
poor sleep quality.
#3.
Office Manager
Apart from the occasional trip to the printing machine,
office work can give you limited physical activity and
prolonged sitting time.
#4.
Laboratory Technician
The responsibilities of laboratory technicians, especially
those working in busy, fast-paced environments such as
hospitals, can be stressful for those who do not perform
well under pressure.
#5.
Booking Agent
The booking agents usually work in hotels and have to talk
to customers, so they have to be helpful and friendly all
the time, even for those who are rude.
Try your best to
please rude customers can take a toll on your emotions.
#6.
Event Coordinator
Being an event coordinator means that you have to spend
long hours sitting with your clients to meet your demands
and you also have to deal with the stress of making sure
everything goes as planned.
#7.
Police Officer
Police officers have to deal with extreme or dangerous
conditions that can affect them psychologically.
They can
also have night shifts, and some police officers do the
office work.
#8.
Teacher
Teachers have a lot of work to do because their job does
not end at the end of the school day.
They have to make
lesson plans and notes at home, meet with parents and deal
with budget cuts and a demanding curriculum.
These
responsibilities can be stressful and leave little room for
physical activity.
#9.
Nurse
Nurses work in a high-stress environment because they have
to care for sick and dying patients.
Nurses can often have
a night or double shifts that leave them sleepless for many
hours.
#10.
Mental health case manager
Case managers help people with mental health problems
improve their lives by providing them with services they
need, such as employment or housing services.
Each client
has a unique case, and case managers have to work long
hours, call services, and advocate for their customers to
give them the help they need.
Even if you love your job and you can not imagine doing
anything, it is true that it can have some disadvantages
like all jobs.
To minimize the adverse effects your work
may be having on you, add some relaxing essential oils in
your workspace, do some exercises at work, and learn to
sleep better, no matter when it's your turn.
Stay healthy and active!
Share and make your loved ones
aware!
Thanks for watching
If you like the video please, thumbs up and subscribe to
our channel
-------------------------------------------
Julie Calvey Spiritual Guide Awaken to You Raise your vibration Open your heart - Duration: 10:52.
www.themethod.vip
-------------------------------------------
Phrasal Verb Opposites in English - Duration: 9:09.
So then I just got out of there as soon as I could.
It was... It was a terrible scene.
Okay, you ready for this?
Let's do it.
Hey, everyone.
I'm Alex. Thanks for clicking,
and welcome to this lesson on: "Phrasal Verb Opposites".
So, today with the help of my friend, Steve the spider, I am going to look at...
How many?
One, two, three, four, five, six, seven, eight, nine, 10 - 10 phrasal verbs and their opposites
for a total of 20 phrasal verbs.
That is more phrasal verbs than Steve has legs.
More phrasal verbs than Steve has legs.
Right?
So, we'll start from the top.
First: "check in" or "check into".
So you can check into a hotel when you first arrive.
Say: "I'm here to check in."
Okay?
Now, when you check in, obviously, when you finish your stay at a hotel you have to
"check out" or "check out of" the hotel.
So, Steve, remember that time when we drove down to the States, we went to Fun Spot which
is the biggest arcade in the world, we checked into the Holiday Inn on a Friday,
and we checked out on a Sunday?
It was a good time.
I played Pac-Man Mania for like four hours
straight.
Next, we have: "get in".
So, "to get in", specifically into an enclosed space like a room or a car, or "get into",
the opposite is: "get out" or "get out of" a place or something.
So, in a car, for example: "I got into the car. She got into the taxi."
So you get into a taxi or into a car, and then to leave you have to get out.
Now, you can also be inside your house, and you can tell someone, it's like: "Get in, get in, get in."
Or if you're very angry at them, you can say: "Get out!"
Like that one time, remember that?
You know what I'm talking about.
All right, next: "get on" or "get onto",
"get off" or "get off of".
Now, this is specifically for public transportation.
So, you can get on or get onto a bus, a train, a plane, a boat.
And then when you leave the bus, leave the train, leave the boat, leave the plane, you
get off the plane, get off the boat, or get off of the bus, or the subway, or the metro.
So, you get on the metro, the trip is finished, get off the metro.
Okay?
Depending on which part of the world you're from, you might say the metro or the subway.
I say metro because I work around Montreal, but if you go to Toronto most people say subway,
so it depends where you're from.
Next: "go out" and "stay in".
So this means...
"To go out" means to go see a movie, go outside of your house on the weekend, and do something
with your friends.
So after this, Steve and I are going to go out and have a little party somewhere.
Don't know where.
We haven't decided yet, but we got some friends waiting for us outside and we'll decide after.
Now, if you don't want to go out and you prefer a quiet night in your house, in your room
like Steve listening to Pink Floyd in his bedroom while staring up at the ceiling,
then you stay in.
So your friends ask you: "Hey. Do you want go out tonight?"
Say: "No, no.
Pink Floyd.
I'm going to stay in.
I need to take in this music."
Next: "pick up" and "put down".
So, very literal.
Pick up, put down.
Pick up, put down.
So you can pick up a glass, put down a glass.
Pick up a pencil, put down a pencil.
And this is another meaning of "pick up", so we have "pick up" and "drop off".
In this situation "pick up" can mean to get something or someone from a specific location.
So you can pick up someone from the daycare.
If you are a parent and you have a young child, you can pick them up from the daycare, at
the end of the day you get them.
You can drop them off at the daycare in the morning, meaning you leave them there.
For example, after work if you're calling your friend, your mom, your roommate, your
wife, your husband and they say:
-"Hey. What time are you going to be home?"
-"Oh.
I'm going to be a little late.
First I need to drop something off at the bank"-maybe a bill you have to pay-
"and I need to pick up something from the grocery store."
So maybe you are out of milk, you have no more milk so you need to pick up some milk
from the grocery store.
And, again, "drop off" not just for people, not just for kids, it can be for things, too.
Both of them can be for things.
So you can drop off money at someone's house, or drop off a CD, or drop off movie tickets somewhere.
"Put on", "take off".
So this is largely for clothes.
Right? So you can put on your socks, take off your socks.
Put on your jacket, take off your jacket.
Now, Steve after about one beer likes to take off his clothes.
I know he doesn't...
He's not wearing clothes now.
He looks good naked, anyways.
Spiders look good naked.
That's a weird sentence. I'm sorry.
But we'll...
We'll stop there.
I don't want to continue that story.
So: "slow down".
The opposite of "to slow down" is "to speed up", hurry up, go faster.
So if you're driving and, you know, you're driving with a friend, your friend might say:
"Whoa, whoa, whoa. Slow down. You don't want the police to stop you."
If you are late for something, your friend might say: "Speed up."
Okay? "We need to go quicker."
"Stay up" and "turn in".
This has a very specific context.
So, "to stay up" means to not go to sleep, but to say awake at night.
So, for example, last night I stayed up until 1am playing Dungeons & Dragons with my friends.
It's not true, but imagine.
So we stayed up until 2 o'clock watching old movies, old horror movies, for example.
Now, if you don't want to stay up, don't want to stay awake, you can turn in.
"To turn in" means to go to bed, go to sleep.
So, I stayed up until 11, which means I turned in at 11.
I went to sleep at 11.
And finally, "turn up", "turn down".
Very specific context.
If you have, you know, a stereo system, you can turn up the volume, make it louder, or
turn down the volume, make it softer, quieter.
[Music]
Steve, turn that down.
So, those are 20 phrasal verbs.
20.
I know it's a lot.
Again, more phrasal verbs than Steve has legs.
So, if you'd like to test your understanding of the material,
I recommend that you watch this video more than once because there is a lot of information here.
And then you can do the quiz to make sure you fully get it.
If you enjoyed the video, please like it, comment on it, subscribe to the channel, and
check me out on Facebook and Twitter.
And if you want to support what we do here at engVid and make sure that we do these videos
forever and ever until the end of time, you can always donate to the site at the link
found somewhere here.
Okay?
Until next time, thanks for clicking.
Let's get out of here, Steve.
Steve!
-------------------------------------------
Just the Way You Are - Movie - Duration: 1:25:00. For more infomation >> Just the Way You Are - Movie - Duration: 1:25:00.
 -------------------------------------------
How To Build Rapport Productivity Tips - Duration: 4:25. For more infomation >> How To Build Rapport Productivity Tips - Duration: 4:25.
 -------------------------------------------
What you see after you die - Duration: 0:37.
I am your god.
I created the universe that houses your pathetic species.
Everything you have experienced is due to my generosity.
Yet you are all ungrateful.
I regret creating humans. You all disgust me.
There is no paradise. Only eternal darkness.
-------------------------------------------
I Got You - Johnny Adam ft. Nick Mustakis Prod. Kade Spieser - Duration: 3:04.
One thing I know is I got you, One thing I know is I got you
We can carry all the weight girl, I'll spot you
If a girl wanna hate, know it's cause they not you
You don't know what you did baby
Made my heart go and take a trip baby
And I can't seem to get you off my mind lately, no
Yeah, Everything good don't change it all
All I need to say is don't change at all
I don't even care what they make of us
These days keeping shit real feels dangerous
Yeah
I don't even know who we can trust
Yeah Yeah
One thing I know is I got you, One thing I know is I got you
We can carry all the weight girl, I'll spot you
If a girl wanna hate, know it's cause they not you
One thing I know is I got you, One thing I know is I got you
We can carry all the weight girl, I'll spot you
If a girl wanna hate, know it's cause they not you
You don't know what you did baby
Made my heart go and take a trip baby
I can't seem to get rid of how I'm feeling lately
Yeah, Everything good don't change it all
All I need to say is don't change at all
All that fake talk you know they made it up
I don't wanna talk unless they paying up
Yeah
I don't even know if we can trust
"I can't even lie, This is real love
One thing I know is I got you, One thing I know is I got you
We can carry all the weight girl, I'll spot you
If a girl wanna hate, know it's cause they not you
One thing I know is I got you, One thing I know is I got you
We can carry all the weight girl, I'll spot you
If a girl wanna hate, know it's cause they not you
You don't know what you did baby
Made my heart go and take a trip baby
And I can't to seem to get you off my mind lately, no
Yeah, Everything good don't change it all
All I need is to say don't change at all
All that fake talk, know they made it up
I don't wanna talk unless they paying up
One thing I know is I got you, One thing I know is I got you
We can carry all the weight girl, I'll spot you
If a girl wanna hate, know it's cause they not you
One thing I know is I got you, One thing I know is I got you
We can carry all the weight girl, I'll spot you
If a girl wanna hate, know its cause they not you
-------------------------------------------
Bytefence anti malware pro version 3.11.0.12 serial key - Duration: 11:47.
Please download software by my link, share my video, thank you very much
Hello and welcome to this video on: How to install you connector to your PC.
Now, we have made a route, and we want to export the route to your device.
First of you go to routes, and you click on the route you wish to export.
I wish to export this route.
In the top right corner you will see the word "export"
Click on that.
That opens this little pop-up window.
We are on a Windows PC, so we click 'windows'.
And in the bottom left corner you see connector set-up. Click on it.
Welcome to the Myroute-app set-up wizard. Yes, next.
That is fine, next we will start the installation.
Do you allow this app to make chances on your device. Yes we do.
MyRoute-app has been succesfully installed. Click close to exit.
And now the Connector is installed on your PC.
-------------------------------------------
MyRoute-app Academy Chapter 5: Video 'Travel stories' - Duration: 7:03.
Hello and welcome to this video on: Your profile.
And in this video we will be making a travel story.
So we will go to profile. And here you will see, profile, timeline, travelstories.
click on travelstories.
Now, no travelstories found. This is correct we havent made one yet on this account.
So we will make one by adding a journey in the top right corner.
Give your travelstory a name. We will call this test travelstory.
Describe the travelstory. It was a beautiful
It took 3 days. Very nice weather.
This is something I just came up with on the top of my head.
But this is something you should descibe the journey with.
What you want to do here is that you want to
make the people want to read your travelstory.
This is the banner of your travel story.
You want to give an impression on how your travelstory was.
So what I just wrote was pretty dull. Make it spiceful,
Make it so that people want to read your travelstory.
When did the journey start, it did not start on the 25 of April.
Lets say it started on the 1st of April and ended on the 4th of April.
Add journey.
Ok, so now we have the start of our travel journey.
The background of this is a default background since I did
not add a picture. You can always add a picture later on.
So we edit the journey, and we choose choose
files: here you can add a file or a picuture.
And just like that I am back. I now have a picture ready.
Please note that the photo must be at least 500pixels high and wide.
So make sure that when you are adding a picture smaller than
that, that you have to make the picture a little bit larger.
I do not want to delete the journey no, I want to edit the journey again.
Choose file and I will pick the correct file now.
And as you can see the journey is now created. The background is here.
It is still a test travel story. I am not going
to publish this yet. Since it is not ready yet.
I will appreciate it, and now we can make the report of the travel.
You can add a day by clicking 'add day'.
I will just call this day 1. When did the travel day start?
It started on april 1st and finished on april 2nd.
Next step, so this is day 1.
Now here you can type in what you did on day 1.
On day 1, I left the office and went on my journey.
A little small, but please do make these travel stories a nice read.
You want to inform the other users on what you did on your travelstory.
Make it long, make it big, this is just a test to show you how to do it.
But try to make them so that people really want
to read them or really want to comment on them.
So you can add a picture again, lets add a route.
Lets say that we started with this route. Test route course.
The route is added and now lets add a track. Test route.
Once again. So now, wait Ill just show you.
Save changes.
Now when someone will click on your travel story they will see this.
- I will just publish it.
So you go to activities.
And here you will see test travel story Anthony.
You will see that there is one appreciation. You will see the small
text, it was a beautiful trip, took 3 days. very nice weather.
And here you will see that it has one stories. So one day.
It was 621 km tracked. Here you can view it in detail.
So day 1. We have only added one day. We can add more days.
Zero moments, I did not take any pictures. but we do
encourage people to take pictures during the trip.
And add those pictures on your track.
Just track it with the mobile app of MyRoute-app.
And during the tracking of the route.
You can open your phone, open the app and you can click on moment and snap a
picture and you can upload that omment on that particular part of the track.
And when you import your track to the travel story
it will automatically take the moments with it.
So you will have moments in your travelstory already.
You can leave reaction.
a comment on the travelstory. Did you enjoy the travelstory?
It was a very nice read.
I hope that you had a lot of fun. ! And then you press 'post'.
And then the owner of the travelstory knows that you
have read the travelstory and that you enjoyed it.
I personally really like receiving comments. So I always give a comment
Tell the people what I thought of their travelstory.
this encourages them to make a new/different travelstory.
And it is very nice to receive the feedback.
-------------------------------------------
MyRoute-app Academy Chapter 2: Video 'Introduction Routelab' - Duration: 0:58.
Hello and welcome to this video on: Routelab.
Now, when you are logged in to MyRoute-app. You
will find yourself within the Routelab immediately.
Routelab is essentially the core of MyRoute-app.
Here you will be able to create your routes, upload your own routes.
Export your routes, and you will be able to view the routes of other users.
You can also use those routes from the other users as your own routes.
And you will be able to comment on those routes
and let them know what you think of the routes.
At the end of this chapter you will be able to navigate
within the routelab freely, and use its functions easily.
-------------------------------------------
MyRoute-app Academy Chapter 5: Video 'Track archive' - Duration: 1:26.
Hello and welcome to this video on: how to archive your tracks.
This video is very similar to how to archive your routes.
Please go to your profile.
Click on tracks.
And here you will find all of your tracks. Since
this is a new profile we only have one track.
But that is enough to archive.
Please go to the right hand side, click on new, and click on folder.
Now we will make a new folder called: Newer tracks.
That is not for the current track since this is an older track.
And now we will make a different folder called older tracks.
create.
And we will drag the older track to that folder.
Now if you click on it. You will see that the track is within the folder.
And if you made a mistake, if you dragged the wrong track to the wrong folder.
You can drag it back to the parent folder like so, click
on the parent folder and it is back where it belonged.
This is how to easily archive all of your tracks.
-------------------------------------------
MyRoute-app Academy Chapter 2: Video 'Route mapping Streetview' - Duration: 4:30.
Welcome to this video on: Routemapping and the use of Streetview.
Once you are logged in to Myroute-app please make your way to Routes.
Click on the route you wish to map with, and compare
with other devices or other route calculation.
Now as you can see in the top right corner, this
route is currently calculated with the TomTom map.
You can change this to the Garmin device.
The HERE/Garmin map, if you have a Garmin device.
But for now we will just use TomTom.
What I noticed straight away is that waypoint 20, 19 are slightly of map.
Or offroad, so if you zoom in on those.
As you can see, there is no really a reason why these are here.
You would just want to place them on the correct highway.
And place 19 on a highway as well.
(Make sure they are on the correct half of the road!)
Like so! Please make sure that you follow each waypoint when making a route.
Because sometimes things like this happen, and occur. It is not a problem, just
simply drag a drop the waypoint on the correct road. And you will be good to go.
This is for waypoint 20, 19
As you can see, I am now slightly rushing this, and I am not zooming in properly.
And I am still making the mistake of not correctly placing them on the road.
But for now we will just leave it like this.
This is just a tip from me to you, please make sure
that every waypoint is correctly placed on the road.
And take the time to do this.
Now, when you have your own travel group, and one of the people has a TomTom.
The other one has a Garmin device.
And you wish to follow the exact same route together.
You can do so by comparing the route with the toolkit.
Compare route with 'HERE'. The here calculation is the exact calculation your
Garmin devices uses. Now it is the TomTom map so this is the TomTom calculation.
Now you can see the blue route.
This is the HERE/Garmin calculation.
And if you want to make sure your TomTom follows the exact same route.
Just click on the road (line) and you will see this little white ball, drag it.
To the road of the Garmin device.
Still not 100%
And make sure that the routes are exactly on eachother.
Also at waypoint 1, 2 and 3 we have a small problem.
And you can make sure like this that they are correctly mapped.
Alright this was the mapping part of the video, now for the streetview.
As you can see in the left hand side of the screen, you can see this little man.
When I click it every route which is available for streetview will
turn blue. As you can see there is a lot of blue now on the screen.
When you zoom in it should be a little more detailed.
Lets take a look at waypoint number 30.
And click on the road.
Click on the blue road right there.
And this should bring up Streetview. This is
the road we will be taking near waypoint 30.
-------------------------------------------
Beautiful abra boat video Dubai - Duration: 4:57. For more infomation >> Beautiful abra boat video Dubai - Duration: 4:57.
 -------------------------------------------
MyRoute-app Academy Chapter 3: Video 'Using the connector' - Duration: 1:42.
Hello and welcome to this video on: Using the connector.
In the last couple of videos I have shown you how to install the connector.
On your windows (pc) And on your Mac.
The installation is slightly different. But using
the connector is the same on both platforms.
Now we go to routes, and we click on the route We wish to export with the connector.
And like I did before, we click on the topright corner on 'export'.
And we click on, 'open route'.
Remember my choice for the connector links. Open connector.
And this screen will pop-up. This is the connector.
Select your device, the name of the route will be in the top left corner.
And you will have to select the device which you have connected with a USB-cable.
and your PC or Mac.
I now have a new Garmin device connected to
this Mac. So I will click on Garmin New GPX1.1
Export to device, it will convert the route.
Export to device, this may take a minute or so.
But it should be fairly quick. Waiting for device.
And once this is completed, you will see.
Completed the route is exported to your device, enjoy.
And that is how to use the connector.
-------------------------------------------
MyRoute-app Academy Chapter 3: Video 'Exporting to Garmin device' - Duration: 2:53.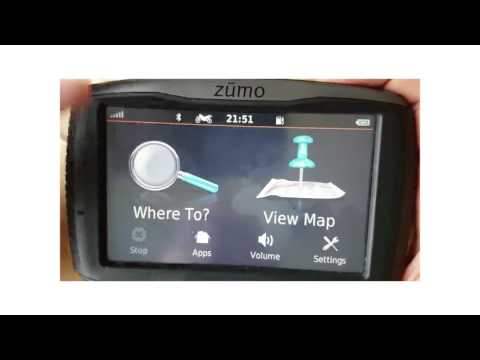
Hello, and welcome to this video on: How to export
your route with the connector to your Garmin device.
First of we are going to have to open the route we wish to export.
I wish to texport this route. It is called TomTom MyDrive but that is alright.
Now we go to the top right corner and go to "export".
What is important to know is that my Garmin device is currently connected with my computer using a USB cable.
This is important, this is necessary so please do this.
You go to open route. This will open the connector.
And this screen will pop-up.
I currently have a new Garmin device connected to my computer with a USB-cable.
So I will click on this. Export to device. Converting route, and it is completed.
The route is now on my Garmin device and I will show u shortly how that looks.
Welcome back, we just exported a route from the connector to this Garmin device.
Please remove the USB-Cable from the computer and just have the Garmin device.
Go to apps.
Click on trip planner.
Here you will see the current trips. That is not important. We go to import.
This may take a while.
This is going to load up every exported route to this device.
If you have a lot it may take longer, if you only
have one it will take a shorter amount of time.
There you go. We go to the bottom, as it is the last route we have imported.
Route TomTom Mydrive video, this is the route we have just exported.
We will click on import.
And there you go, it is now in the trip list. We click on it.
We are going to click on "Go".
Next destination is the end destination. The other one is the first Routepoint.
But you are going to want to click on the end destination.
Calculating route.Please make sure that within the settings
of your device you have turned off the 'recalculating mode'.
This is very important as the route will not look the same on MyRoute-app and your Garmin device.
If you still have recalculation on your Garmin would just make a new route.
And as you can see the route is now on your Garmin device.
-------------------------------------------
MyRoute-app Academy Chapter 2: Video 'Use a route or track from the library' - Duration: 2:14.
Hello, and welcome to another video about the library of MyRoute-app.
If you click on library.
As I said before, you will see all the routes
and tracks shared by the users of MyRoute-App.
But now I am going to show you how you can use one
of those shared routes and tracks as your own.
If you click on a route or track.
Let's say this one. You will see that this one is for driving.
It is 81.3 km long. It took 3 hours.
And it is a recommended track, and it was completed by Daniël S.
You can view the complete track when you click on this.
And now you will see the statistics of the route on your left.
You will see that the minimum altitude was -17 meters.
And the maximum altitude was +18.2 meters.
Now this is still a track, you cannot make any alterations to this.
You cannot add a routepoint / Waypoint.
You will need to make this into a route. Now how do I do this you ask? Well this is simple.
You click on the top right corner on 'use as route'.
Here you will have to give it a name. This track was called "New route Test"
I am going to call this "copy of a track driven by a user"
And now this is your route.
And here you can make the alterations.
Within the route, and maybe change the way the route was driven.
-------------------------------------------
MyRoute-app Academy Chapter 3: Video 'Save options' - Duration: 1:16.
Hello and welcome to this video on: "How to save your
routes as individual file types on your computer, or Mac.
First of we go to routes.
And we open the route you wish to save on your computer or Mac.
In the top right corner you will see 'save as'.
Now this will pop-up a list of file types.
And these file types you can all save on your computer.
On the harddisk of your computer.
Now you will see in the bottom .PDF/
You can save the route as a .PFD file on your computer.
And below that you see 'email route'.
What email route does is what it says. It emails the routefile to a friend of yours.
You can also open the route with TomTom MyDrive. But more on this in a later video.
-------------------------------------------
MyRoute-app Academy Chapter 2: Video 'Difference between routes and tracks' - Duration: 0:48.
Hello and welcome to this video on: The difference between a route and a track.
In this chapter we will be mainly focussing on a route
file, but occasionally you will see the word 'track'.
For now it is important to know
That a track is a route, recorded with the mobile app of MyRoute-app.
There are modern devices which can navigate with a track file.
But more on this in a later chapter of the course.
-------------------------------------------
MyRoute-app Academy Chapter 2: Video 'Comparing routes and tracks' - Duration: 2:38.
Hello and welcome to this video on: comparing your route with a track.
Lets say you've made a route.
Open it.
And you have already test driven this route.Or driven this route.
I have made this route with the MyRoute-app route editor.
I will change it to google maps.
This is the route I have driven.
I have tracked this route with my mobile phone.
Using the track function
So I go to 'tracks'.
Go to 'add'.
And here it is.
Now as you can see, my track slightly differs from the route I originally planned.
I took a later exit, or something along those lines.
And when you upload or share your route with you friends.
You would want to make sure that you share the exact same route, as you've driven it.
So in order to do so, you need to drag and
drop the waypoints that you haven't touched.
To the redline which you have touched.
The red lines are the line of the track.
Sometimes you can just delete a waypoint.
Like so, and it will follow the red line.
Please make sure that - Well, sometimes you have
something like this: and earlier turn or exit.
I usually leave those in, because those arent really of a significant of a difference.
Now here at waypoint 11, this is quite a big difference so we just drag number 12.
Correct number 11, thats fine. Sometimes this happens.
Just zoom in, drag it back to the correct road.
Okay, and you should be good to go.
Alright.
-------------------------------------------
Hospital Acquired Infections, What good is it for you? - Duration: 2:07.
Imagine going into a hospital for a minor injury being discharged, being readmitted due to
a terminally ill disease.
HAI's are growing in this country.
According to Passan's Law Group, 1.8 million people die of HAI's.
75% of rooms are contaminated with HAI's.
You might ask what are HAI's?
HAI's is a hospital acquired infections caused by the viral, bacterial or fungal pathogen.
After mu much research I found many blogs that spoke of patients stories written from
their family members because they, unfortunately, have passed away due to HAI's.
Safe patient, a Safe patient blog had many many many and I picked two.
John Mcclearly and Barth.
They both had a common pneumonia.
So let's talk about John McClearly first.
He had a minor ankle fracture two days after being released he was readmitted with MRSA
pneumonia.
After many heart attacks, with loose of hearing, loose of vision, loose of strength three months
into him being admitted he died of MRSA pneumonia.
Take Barth goes in for a cough given many steroids, many IV's, many needles also acquired
MRSA pneumonia.
Died in a coma from organ failure everything from kidney, to liver very young both of them.
They were both in their mid 30's it's very sad to see they acquired a disease such a
safe place that we go to get better.
I feel like if we use better hygiene, the right use of cleaning supplies, just being
more cautious in a communal area, to stay clean, clean our hands.
Just be very careful in a place like this it would decrease HAI's that we see every
day.
Here's my card.
Thank you for watching.
-------------------------------------------
MyRoute-app Academy Chapter 5: Video 'Share a track' - Duration: 1:33.
Hello and welcome to this video on: How to share your tracks.
Firs of all we have to go to our profile.
Then we have to go to our tracks.
And here you will see all of our tracks, and folders of the tracks.
Now we have this track right here 'the testroute video.GPX'.
If you look on the right hand side, you will see these 3 dots.
Click on it and here you will have some more information on this track.
And when we click on share over here.
You will have the 5 share options in order to share your track.
You can share it on Twitter, Facebook, you can email it.
You can share the link to someone.
And you can embed it to your own website.
If you want to share this you have to make it public, do you want to make it public.
Yes we want to make it.
If we share it on twitter, it will show up as a tweet like this.
If we share it on Facebook, it will show up as a Facebook message like this.
And you can plant it on your own Timeline.
If you want to email it it will open your default email system on your computer.
And if you want to share it as a link it will show
up like this and you have to copy it like this.
-------------------------------------------
Heritage villag boat services - Duration: 1:02.
super videothe most popular video in Burdubai Area
-------------------------------------------
MyRoute-app Academy Chapter 3: Video 'Exporting to TomTom device' - Duration: 3:27.
Hello and welcome to this video on: How to transfer your
route to your TomTom device using the connector.
First of we are going to have to go to the routes.
And we are going to have to click on the route we wish to transfer.
I wish to transfer this route.
Now we see the route.
In the topright corner you will see export and
this opens the pop-up screen of the connectortool.
Now it is important to know that the TomTom device must
be connected through a USB-cable with your computer.
It is also important to know that you have to press on the import route button
On your TomTom device before doing this.
Your TomTom device needs to be in the mode to import routes.
Each TomTom device differs in how to enable this
mode. But each TomTom device should have button, ready to import the routes with.
I currently have this button activated.
I am going to press: Open routes.
'open connector' this will open the connector. And I have new TomTom Rider.
So I will click on that and I will click on export to device.
Lets see if it works right away..
Export failed that is fine. I am going to click on import routes.
'use your computers file blabla' So this is activated now. Export to device.
Completed, the route is exported to your device. Ok.
So what first went wrong, was that I thought I had the import routes button on.
But it wasn't actually on.
Now it is on. And as you can see the route is completed. And I
will show you shortly how that looks on your TomTom device.
I just turned my TomTom device on. As you can see it is connected to my computer.
And you are going to have to click 'import routes'.
Now once you see this screen you are going to
have to click on the connector on your computer.
And you are going to have to click 'export to device'.
Only if you see this screen, this is on a particular TomTom Rider.
Once you are done, press done.
And here you will see the routes that you have just imported to your TomTom device.
I imported 2 routes. The first was a test route.
This is the route we just imported in the video.
We are going to click on 'import'.
Now it is importing the track.
I cut forward a bit, because it is very boring to see a loading track symbol.
Now if you go to menu and we click on ' My Routes'.
As you can see.
The route file and track file are imported to your TomTom device.
Click on 'track file'.
And there you have it is calculating.
And that is the track that we have just imported on the TomTom device.
-------------------------------------------
MyRoute-app Academy Chapter 5: Video 'Route archive' - Duration: 2:28.
Hello and welcome to this video on, how to archive your routes in your profile.
Now, once you are logged in please go to profile.
And here you will see, profile, timeline, travelstories and routes.
Please click on routes.
And this is your archive, this is your heart of the MyRoute-app profile.
Here are your routes stored.
And people can see this when they look up your profile.
And they can only see the routes made public, they cannot see the routes made private.
How do you archive this? Because as you can see it is quite a mess.
So we are going to go to the topright corner.
You will see new, here you can make a new route.
You can upload a new route, but you can also make a new folder.
Click on folder, Foldername: Lets name one 'France'.
Privacy mode, public. As you can see, the folder is now
in the top of the route archive. And we will drag everyroute made in france.
To the folder 'France'.
Now we can also make one folder, called:
The Netherlands, create.
And we can also make a folder called, Germany.
And press create.
So we will drag the routes accordingly to each folder.
The Netherland routes to the Netherlands folder, Germany routes to Germany folder.
And now it is very organised, and very handy to use.
Routes and friends are over here, then you can go back to the parent folder.
Germany over here > Parent folder > Netherlands over here > Parent folder.
And you are back, it is that easy.
-------------------------------------------
Things To Do Before You Upload Your First YouTube Video | O. Henry - Duration: 18:59.
Hey guys it's Olivia and I'm back with another video.
So anyone who knows me in real life and knows that I am a major perfectionist.
So before I started my YouTube Channel there were so many things that I felt the need to get right before I even uploaded my first video,
'cause I'm like there's no point in uploading my video unless I figure this stuff out first.
So in case you're thinking about starting a channel I just wanted to tell you some things that I thought about
and maybe some things that you should do before you upload your first video.
So the first thing is, after you sign up for a YouTube account, like when you go to your channel,
your channel is completely blank; you don't have a profile picture you don't have channel art, you don't have anything.
So kind of under this category of like, kind of setting up your channel;
the first thing that you should do is choose your profile picture.
So I'm going to assume that you already have, um, social media platforms. So whatever picture is your Twitter avi or your Instagram profile picture
is probably a very good picture of you hence why you already used it as your profile photo, so I would recommend using that as your YouTube profile picture.
Um, if you don't have any social media platforms, and so you don't already have a profile picture that you like, I recommend just using like, the best picture you have of yourself.
Like, this is my, um, profile picture on YouTube
and this picture was actually taken 3 years ago; I am 15 in this picture, I am currently 18, but it still looks like me 'cause I haven't really like, aged much I guess.
So use a recent picture of you that still looks really good.
Like if your favourite picture of yourself is when you were 10 but now you're 18, then you probably don't look like that anymore.
So I recommend using a, up-to-date photo of you; it can be from a few years ago if that's still what you look like.
And make the picture kind of like a headshot. Like this picture was literally taken on the front-facing camera of my iPhone 4,
but I filmed it outside, the lighting was pretty good and I think that that it's a good picture.
Like honestly, the reason why I'm using a picture from 3 years ago is because I'm not photogenic,
so honestly this is the best picture that I've taken of myself in the past 3 years;
hence why I use it on basically every social media platform that I have.
Um, so yeah, make it a picture of maybe your shoulders up
because like, especially when you comment on other people's videos, your picture shows up like this big.
So then if you do a picture of your whole entire body, then like, if the picture is this big and your body fills the picture,
then your head's gonna be like that big, meaning people aren't going to be able to see your face.
Um, and you want people to see your face 'cause you want them to know who they're gonna be watching before they actually go to your channel.
'Cause if you comment other people's videos, that's how other people might find you, and if your head in that picture is this small
then people don't know who they're looking at.
Another thing with your profile picture is, have the picture be of only you.
Because if you have a picture of like, you and 6 of your friends, once again if you comment on somebody else's video,
then your picture's gonna show up really small and then you're just gonna see like, 6 tiny heads
and another thing people aren't gonna know which one is you.
So I recommend using a picture of maybe from like, the shoulders up, um, and make it a picture that still looks like you look like now.
Like the only difference between me and this picture is that my hair is different,
and if I were to change my profile picture every time I changed my hair, um, I'd change my profile picture like, every 2 months, so yeah.
The second thing pertaining to your channel setup is your banner.
So, this is what my banner looks like and, um, basically I just used like a cartoon version of myself and then I put when I would be uploading.
So as I said I made all of this stuff before I uploaded my first video,
so I didn't know what day of the week I wanted to upload to yet. So I just put, "New Videos Every Week" because I did know that I wanted to upload, um, once a week,
but I didn't know the exact day. So instead of not making on YouTube banner and then uploading a banner after I uploaded my first video I was like, this is specific enough,
people know it's once a week, and if someone actually watches my video; at the end of all my videos I say, "I make new videos every Monday,"
so I felt like that was fine.
Some things that I suggest putting on your YouTube banner is, as I said like, when you're gonna upload.
Like, if you're gonna upload once a week, you could write, "Uploading Once A Week" or you could write the specific day that you upload.
If you are uploading multiple times a week then you can say the days of the week that you will be uploading on and put that in your YouTube banner.
You can also, obviously put your channel name, um, and you could maybe put like what type of videos you're gonna make.
Like, if you're gonna make gaming videos you might put that in your banner, if you're gonna make beauty videos, lifestyle videos,
uh, maybe put that in your banner so people know what your channel is about.
I personally don't have that in my banner but it's something that I've seen in other people's banners.
Another thing that I think is a way to personalize your banner is like, I have like, a cartoon version on myself.
Um, maybe you could -- I've seen some people who put like, collages so that's their background; like the background of my YouTube banner is just blue stripes right,
so you could put a collage of yourself or you could put a picture of yourself on the corner of yours, like I did with mine.
Um, 'cause if you just took like a coloured background and text, then there's so many other people who could have very similar banners as you,
so like, add something into your banner to make it like, personalized so people know this is THIS person's banner not, this is A banner.
Another thing pertaining to the look of your channel is consistency and what I mean by that is like,
I have specific channel colours. Like, if you look at my YouTube banner, and it has the 2 different shades of blue in, um, vertical stripes,
that's the exact same background as my Intro. So you saw the Intro of this video, how it was my name, Olivia Henry, and then it erased to O. Henry.
That blue and the blue in the background of my banner are the exact same. The font is the exact same font, and the colours are the same colours.
So, um, in my Intro the Olivia is in white and the Henry is in black and then in my YouTube banner the O is white, the Henry is black.
In my End Card the, the same thing happens as in my Intro, it says, "Olivia Henry" and then it erases to, "O. Henry"
and the colours are same, black and white.
Um, if you look at my End Card, my End Card is purple. Um, it's kind of like a pink-y purplish colour,
um, which I wasn't originally gonna do but I made it by accident and I thought that it looked really good so then I just decided to use it for my End Card.
But yeah, I recommend having consistent colours. Um, so my, kind of, channel colours are blue, black and white.
Blue is my favourite colour and black and white go with everything so I thought that, that was a very good colour combination.
Another thing is font.
So if you look at the font in my banner, and you look at the font in my Intro, and you look at the font in my End Card, and you look at the font in my thumbnails,
all of them are the same.
Another thing with my thumbnails, is I use my colours. My black and white 'cause that's kind of my text colours,
and my blue is kind of my background colours.
And so, if you look at some of my thumbnails, like I'll insert a couple, I always use black and white and I alternate my colours.
So if the first word is black, then the second word is white, and the next word is black and the next word is white.
And then if you look at like the background colour that I put behind each word; it's the opposite colour.
So if it's a black word it has a white background and if it's a white word as a black background and then I always alternate between the two.
Um, so black and white are usually the colours that I use for my text, but not always,
'cause if you look at some of my other YouTube video thumbnails such as these;
then you'll see that I might have used a different colour but I am using the same font and I am using the same pattern;
um, alternating the colours for the text and alternating the colours for the background behind the text.
So even though the colour might not be consistent, the font is consistent and my pattern is consistent.
Because when you go to like, someone's channel, and then you click, "Videos," it shows all of their videos.
And one thing that you should try to do is make all your videos look good together.
So one thumbnail might look good and this thumbnail might look good, but do they look good beside each other, is, um, something to think about.
Like, the same thing if you have an Instagram, how your Instagram feed might be like that.
My Instagram feed is nothing like that I just post pictures when I feel like it and they don't correspond at all but...
Have you ever seen like, an Instagram feed that looks so nice? Like it's -- they always have the same amount of brightness,
they always have the same amount of saturation, they always have the same colours,
and like, their pictures look good individually but they also look good as a whole.
Like, when you go to their Instagram and you select the grid, how their picture just look so good together.
So that's how you should kind of want your thumbnails to look together, when someone goes to your video page and you just see all of them.
So that's kind of it for like, the look of your channel.
Um, another thing that I thought long and hard about before I, um, uploaded my first video was what my channel name was gonna be.
Um, I also had to think about that before I made my YouTube banner because I put my channel name on my banner.
So as you know, my channel name is O. Henry.
My first and last name is Olivia Henry, so it's kind of just a play off of my name.
Um, when coming with a YouTube name, I feel like you can never go wrong with your name because you -- it's a channel by you.
So even if your channel isn't about you, like let's say you're doing a gaming channel, so you're gonna be doing a lot of screen capturing,
and your face might be in the corner of the screen, but like, the main thing is the game you're playing;
I feel like having your name as your channel name isn't a bad thing because it's games by you, you know what I mean?
So there's lots of gaming channels out there, but the reason why lots of them are successful is because the game is being played by different people,
and you can see this person's strategy, and you can see the games that this person has, you can see the review this person has.
So it's a different perspective even though it might be the same game.
Um, so yeah, I feel like putting your name in your channel name kind of personalizes it.
Another thing that I've seen other people do, is they put like, the type of channel in their YouTube name.
So like, for example, if I had a gaming channel it would be Olivia Henry Gaming.
That way if you commented on somebody else's video and then somebody saw your channel name, they know before they even click on your channel, what your channel is gonna be about.
So my channel is like, basically about me and my opinions on things. Hence why my YouTube channel name is just my name,
'cause it's basically revolving around me. So if you want to make it personal by putting your name in it,
but also like, give people a kind of idea of what your channel is about, then you could do that.
Like if you are doing makeup videos you could be, "Olivia Henry Makeup" or "(Your Name) Makeup," um, you know what I mean?
So you can, but you don't have to.
One thing with a YouTube name is, making something that you won't regret in the future.
Like, if you're very young your interests change. Like, I'm very young; I'm only 18 years old.
Um, but let's say you're like 10 and you wanna start a YouTube channel, before you create your channel name,
like, let's say right now you're into unicorns and rainbows and you just love everything.
If you name your channel, "Unicorns Rainbows I Love Everything," well, when you get older, maybe that's not what you want your channel name to be.
One thing that I thought of before I created my channel name is, "Would I want people to call me that in real life?"
Because your channel name is your online persona, right?
So -- I'm not a big enough YouTuber for people to recognize me on the street, but let's say they did.
Like, let's say I'm on this side of the street and you're on that side of the street. Am I okay with someone yelling, "O. Henry!"?
I'm okay with that. I'm okay with you yelling my name across the street for everyone to hear.
So if you are gonna name your channel -- I don't remember what I said before -- "Unicorns Ponies I Love Everything,"
are you okay with someone yelling that across the street?
If you would feel a little bit uncomfortable with someone yelling that for everyone to hear, then maybe that's not the best channel name.
So choose something that you would be comfortable hearing, because people will refer to you as that because that's what they're gonna know you as.
Um, one person that I will use as an example is Superwoman.
So in her videos, like when she's doing skits and she's acting like her parents, um, her "parents" called her Lilly in her videos.
So you know that her real name is Lilly, but she's also known as Superwoman.
So if she was on the street and you called her Lilly, she would be okay with that because that's her name, but also, if she was on the street and you called her Superwoman,
she's okay with that because that's the online persona that she wanted to have.
So name your channel a name that you are comfortable with people calling you.
'Cause if you don't want to be called -- I don't remember what I said before -- "Unicorn Pony I Love Everything," then that's probably not what you should name your channel.
And the final thing -- I don't know why I held up a one -- but the final thing that I thought about before I uploaded my first video was,
"What day of the week do I want to upload on?"
So that's pretty important because, I already had my first video filmed probably a week or so before I actually uploaded it,
um, because as I said, I was like, figuring out all these things before I wanted to upload my video.
So let's say -- like today is a Sunday that I'm filming this right now.
So let's say I filmed and edited my video on a Sunday, but I decided that I wanna upload on a Thursday,
then don't upload your first video on a Sunday, you know what I mean?
So if you know that you want to upload on Thursdays, upload your first video on a Thursday.
If you're gonna upload multiple times a week and you know that your upload days are gonna be Monday, Wednesday, Friday,
then upload your first video on one of those days. Don't upload your video on a day that you won't be uploading on in the future.
So yeah, as I said before that's why my YouTube banner says, "Every Week" and not, "Every Monday,"
because I didn't know what day I wanted to upload on until I actually uploaded my first video.
In case you wanna know, the reason why I chose Mondays is because,
when I first started my channel, I would filmed, edit, and uploaded on the same day --
I still do that sometimes, but I'm trying to get out of that habit and like, film one day, edit one day, and then upload on a Monday
so that I have more time to get everything the way I want it -- but, um, at the time I used to do all of my YouTube stuff on one day.
And on Monday was the day that no one was in the house.
So like, Monday nights everyone else in my family had somewhere else to be and it was like, an every Monday thing; I was gonna be home alone.
And at the time didn't like other people being home when I was filming because I didn't want them to hear me.
Like, behind the camera like, there's a wall. On the other side of that wall is my brother's room, and like, 2 steps down the hall is my other brother's room,
and so like, I didn't want anybody to be home and like, hear me and like, if I made a mistake or something.
Because I make mistakes all the time when I'm filming, but then I just cut them out so no one get to hear it, right?
So I didn't want people to hear my mistakes and stuff, like now it's kind of gotten over that, um, but yeah.
Like, when I first started I didn't want anyone to be home when I was filming, so I chose a day when no one was home.
So to kind of recap this whole entire video, because I know that it's pretty long, um, things that I thought about that maybe you should think about are,
a good profile picture, what you want your banner to look like, what colours and fonts and the consistency on your channel to be,
and what you want your YouTube channel name to be, and what days you want to upload on.
So that's all for this week's video, I know that it's very long but I hope that it was informative,
I hope it gave you something to think about, um, in case you were thinking about starting a YouTube channel.
I hope you enjoyed it; if you did give it a thumbs up.
All my social media links will be down below in case you want to follow me on there.
Be sure to subscribe to my channel because I make new videos every Monday,
and I'll see you next Monday with a new video.
Also one more thing that I just remembered, um, you should think about what you want your channel to be about.
You can't make it too specific but you can't make it too vague. You need to -- like, my channel is kind of all over the place,
I do a little bit of this little of that, but that's because my channel is an opinion channel, so I can talk about my opinion on literally anything.
So you need to make it general enough that you can make videos for a long period of time.
So, like, this is my 75th video? I don't remember.
But yeah, so I've been making approximately 75 videos of me just stating my opinions about stuff, because I have a lot of them, and like, I upload once a week
so I can come up with a new opinion on something that maybe happened in my life during that week.
So yeah, make it -- don't make it all over the place like, "Now I'm a gamer, now I do makeup, now I do this, now I do that,"
but make it general enough that you can make more than three videos.
This picture is literally a selfie. I took it with the front-facing camera on my iPhone 4.
Yes?
Ugh loooooooong.