Hello and welcome back to '3D with Kivy'.
Last video was about lighting.
This video is kind of more comprehensive, because we'll use more
than one tool to make our objects.
First, download Blender.
It's free & open-source software and it costs nothing.
After a successful installation you should see this as your default scene.
A cube, a camera and a simple light.
Don't remove them.
This is what the cube looks like now.
We'll make a very simple texture for it and import to our scene.
To do that, first mark edges that will become seams for UV layout.
It's very similar to cutting an object made of paper and unfolding
it at a table - the seams are the cuts, obviously.
I'll put down to the description a link for a very good tutorial about UV mapping.
We'll need to use "Blender render" engine for the texture, because for some reason Cycles
engine doesn't like exporting to OBJ file.
It doesn't include the texture filename in the material file
which obviously means that the texture won't be loaded later outside of Blender.
Choose the "Texture" tab, export the UV layout to a file and edit it.
I left the original layout and just painted on the top of it, in a while
you can see what does it mean after rendering.
Now, when you have the image ready, select the Type of texture to be "Image or Movie",
load the file and don't forget to change the mapping coordinates
to UV coordinates.
That should do it.
After rendering you can see the black lines on the
edges and the cube has its original color from Blender
that's because of the already mentioned painting on the top of the exported UV layout, otherwise
it'd be the same color you'd use as a background.
Let's look at the exporting.
On the left panel notice the "Export OBJ" part.
We need to uncheck "Write Normals" and check "Triangulate Faces".
Don't worry, the normals will be there, just not indexed.
The path mode is basically the path to your texture file.
It should automatically find the best one, for example if the file is next
to your file, then it'll use a relative path.
Leave that at Auto if you aren't sure.
You may want to save the configuration, therefore just click on
the plus button and save it.
Don't forget to export the file.
You can leave Blender.
Now we'll try importing the OBJ file to ourscene.
Import OBJLoader, that thing will by default look for a file
with the same name as OBJ that will become its material.
If none is found, then the default values are set.
We'll replace the main_cube.
No fancy stuff, just fetch for whatever the loader returns.
That also means you might not be able to control some stuff, as it imports multiple
meshes and wraps then into a single instance.
Although we might not need the path to the main.py folder, it's still better be sure
than sorry.
When we run our file, notice the default state of the cube.
It's quite large and the light intensity is too strong.
Scale the cube down by modifying its scale property.
I made a random model in Blender without any texture, something.obj with a material file
from Blender - something.mtl.
Let's try to change the material in Python directly.
For that we need to get to the scene only the objects we want, not a group
of objects from loader.
Then we can change properties of the random object's material.
Texture ratio is basically a value to enable or disable texture.
Our is equal to zero, because we want to disable the default empty texture.
and use our values.
We need to remove the MTL file, so that it doesn't collide with our values.
That's because in the MTL file one value, which is an exponent,
equals to zero.
I'll fix that soon-ish and leave a note in the video.
What we do now is basically removing an old material from Blender completely
and writing a custom one with Python.
Later it should just overwrite the values.
Meshes are located in children property of the object the loader returns.
Since children property is a list, we'll extend our cubes list.
Sooo..., that's all for today.
As always, the code is on my GitHub.
Leave your suggestions for future videos in the comments down below,
subscribe if you like my videos, leave a like if you enjoyed this one.
Bye.

 For more infomation >> #AbrahamHicks Best § Act on your #Inspiration now not later ♥ Esther Hicks #LawofAttraction Videos - Duration: 8:23.
  For more infomation >> #AbrahamHicks Best § #Abundance has a vibrational frequency ♥ Esther Hicks #LawofAttraction Videos - Duration: 14:27.


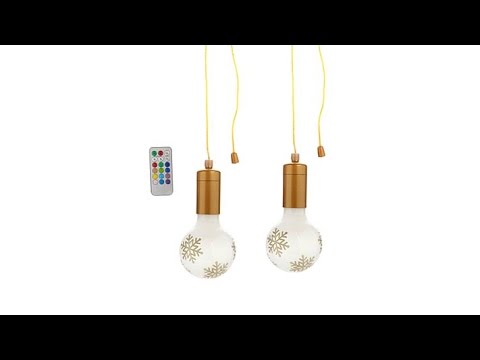 For more infomation >> Improvements 2pk Holiday Color Changing 4" Pull Lights - Duration: 3:38.

Không có nhận xét nào:
Đăng nhận xét